Hello Ladies and Gentlemen, today I am going to be sharing a sewing project with you all. I completed it last February (all the way back in 2024), but just couldn’t find the time to make a blog post about it… until now. So, without further ado, let’s get into it!
The Idea and Inspiration for this Project
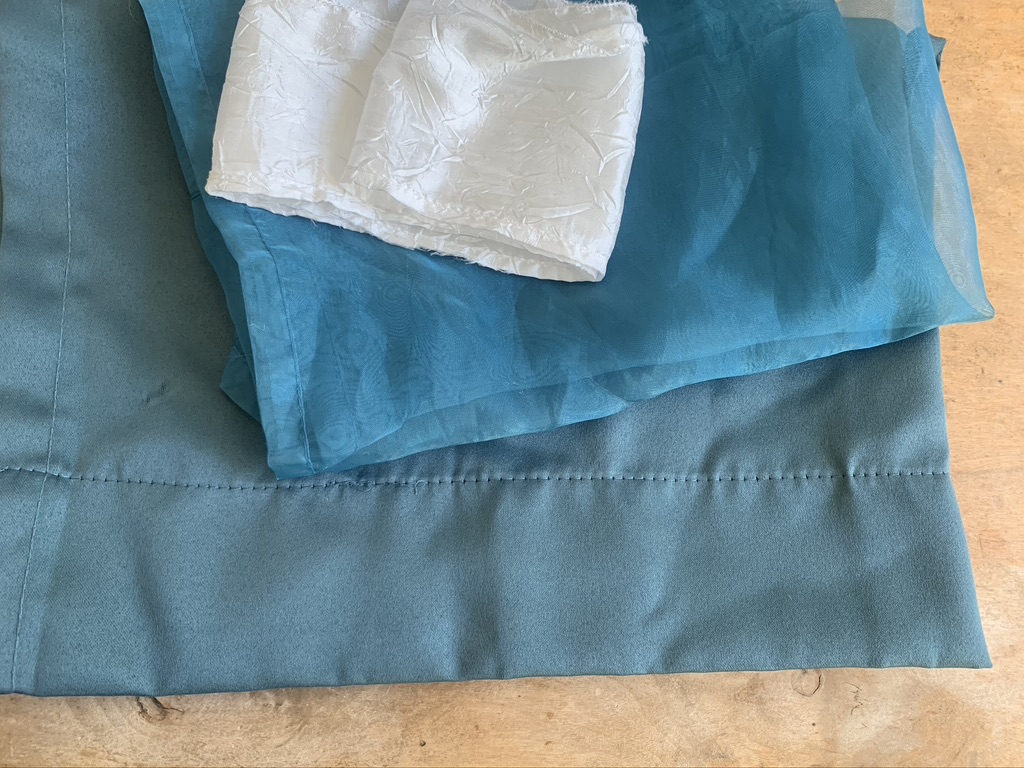
It has been a dream of mine to make outfits that are inspired by nature (water, fire, earth, wind, etc.) One day when I was at the thrift store I stumbled across some blue and white curtains and knew my first opportunity was before me: make a dress inspired by the ocean. So I bought the curtains and began the vision board.
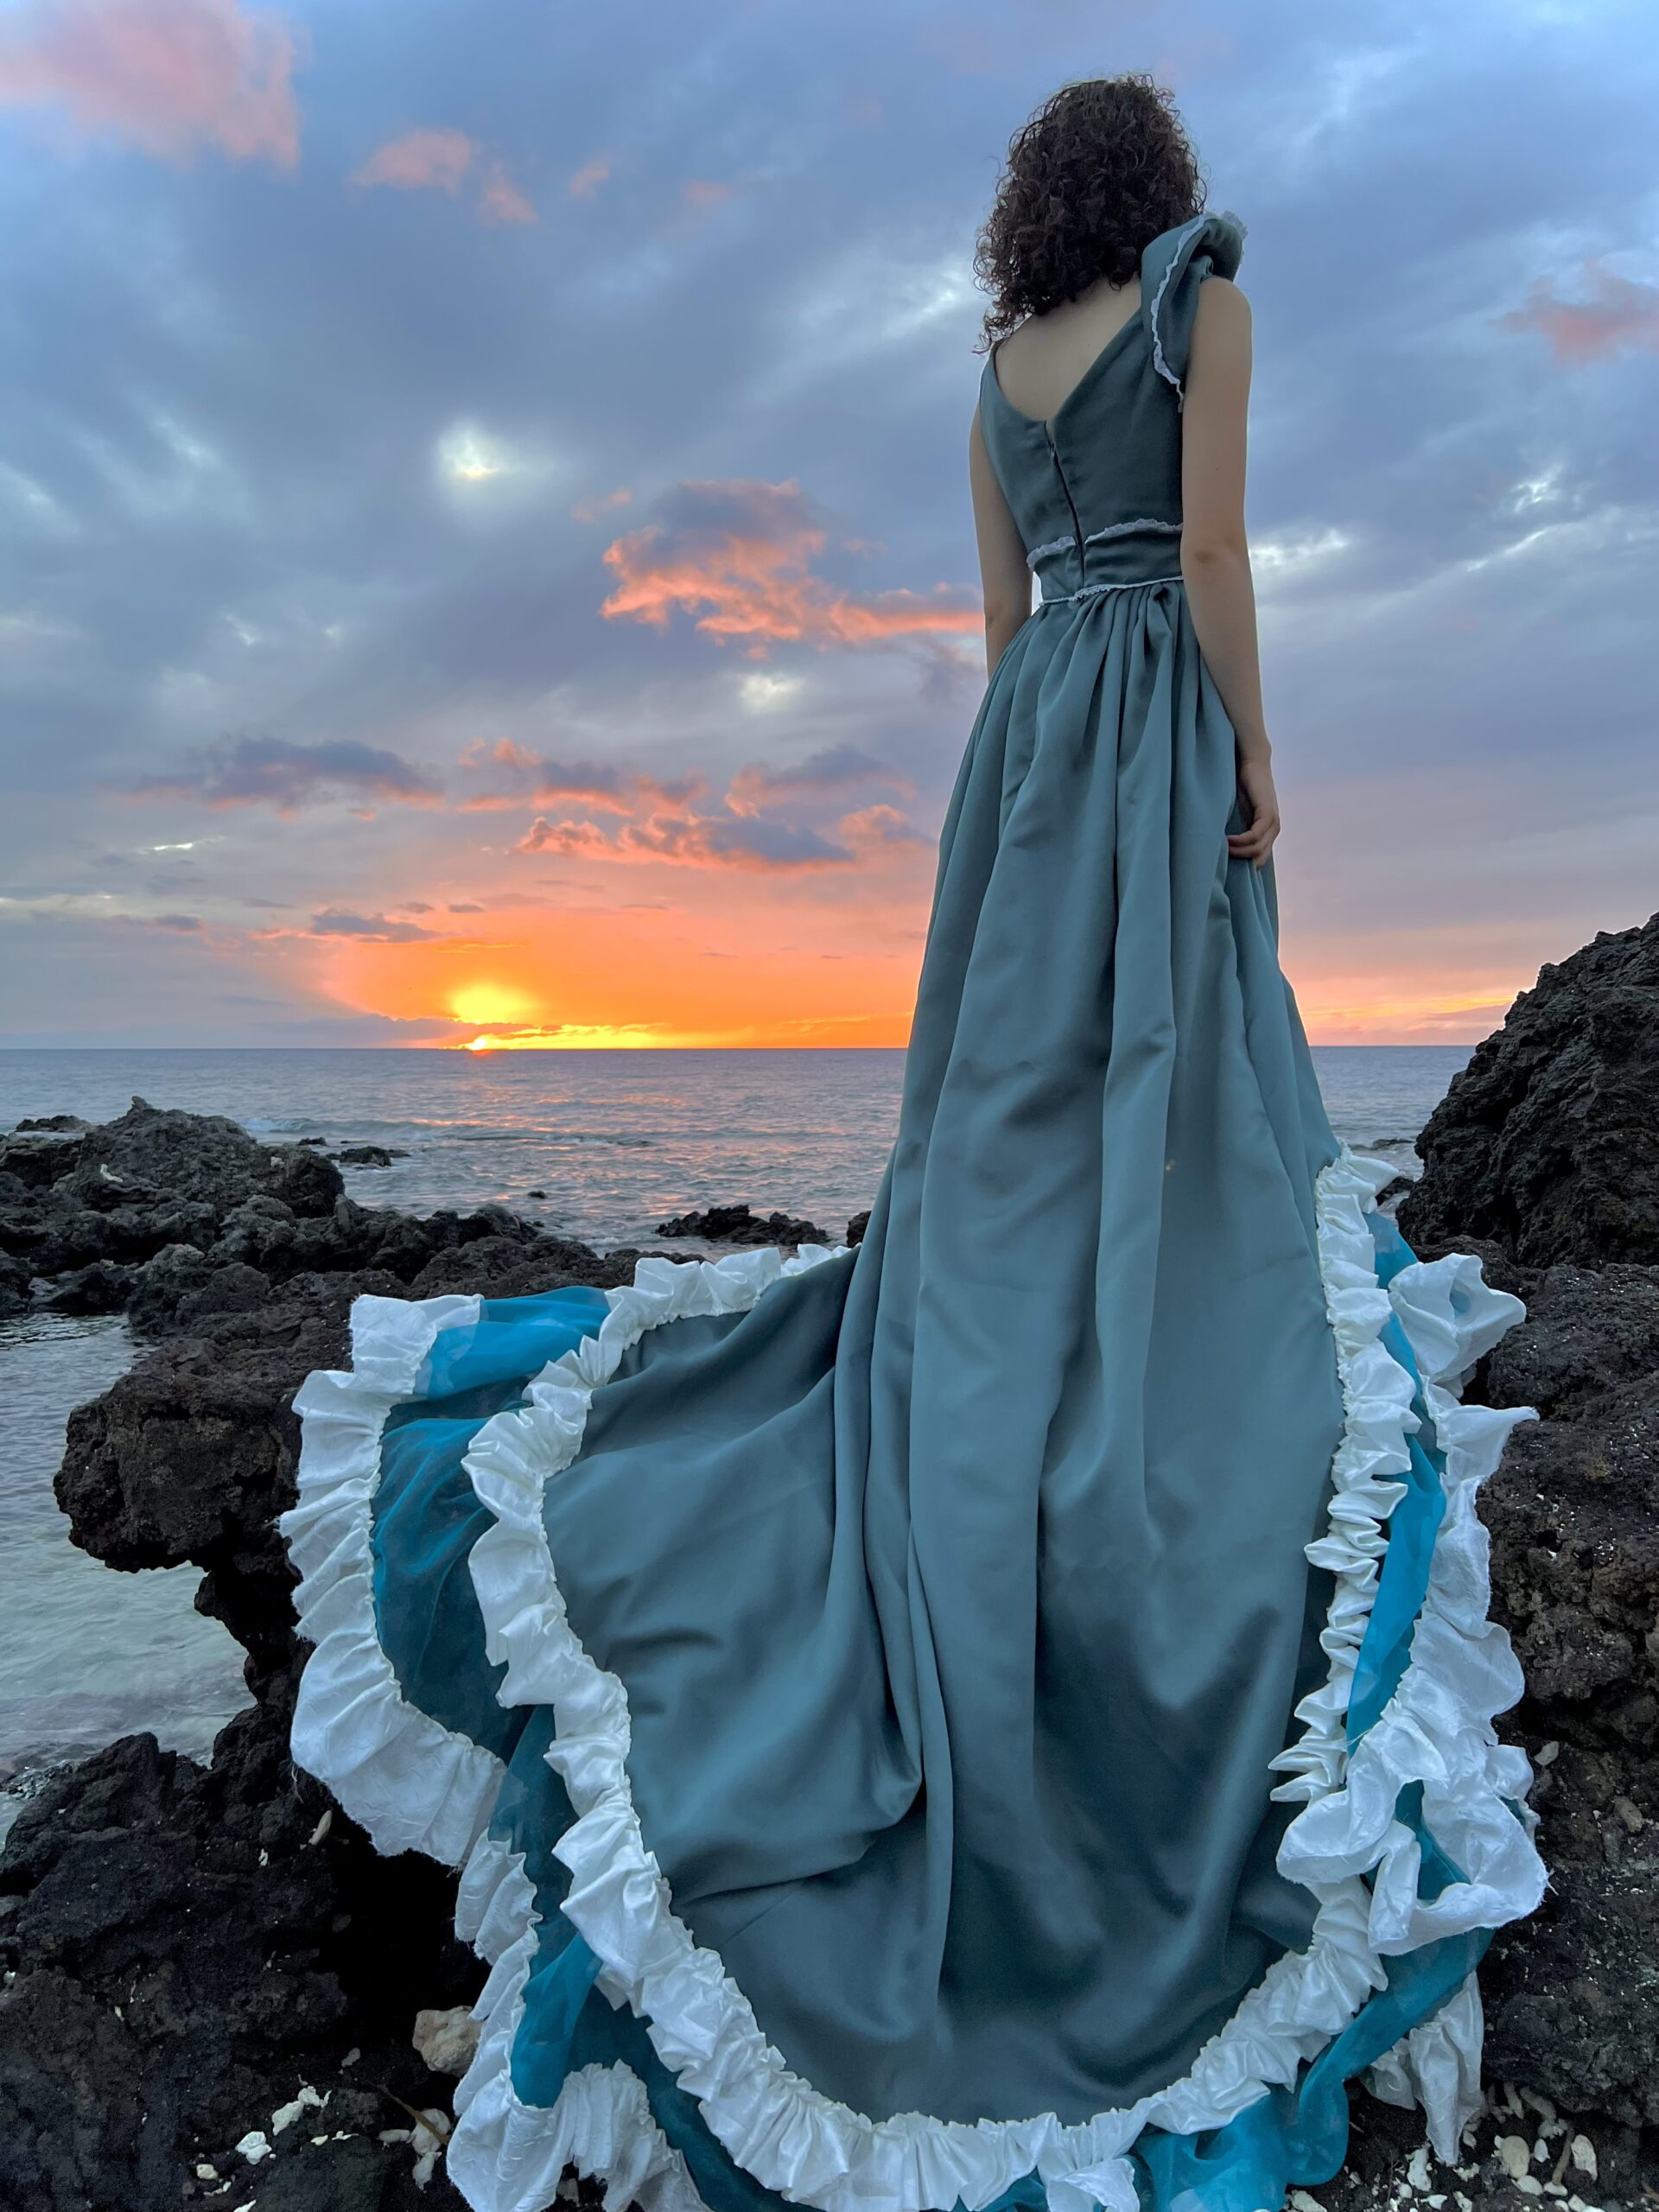
From the beginning I knew I wanted the dress to be trimmed with white frills to give the look of white tipped waves. The rest of the dress design still remained a mystery to me, so I went to google. After googling “ocean dress” and “wave dress” I found a couple pictures that gave me ideas of design elements I could add to my gown. The first element was a raised shoulder (see photos below). The second was a long train. With these elements in mind, I sketched out my ideas.
As the dress took shape (on paper and in my mind), I knew it needed to be a modern formal gown, the materials and design ideas both pointed toward modern so how could I go against it? 😄
Making the pattern
Because this dress was coming from my imagination, I had no pattern to work with, so I had to create my own. For the bodice I decided to do a princess seam. (If you don’t know what princess seams are, I explain in my blog post that is linked below).
For the skirt I knew I wanted it to be short in the front and long in the back, so I took a couple measurements and winged it. I often find that I don’t need a pattern for skirts, especially pleated ones.
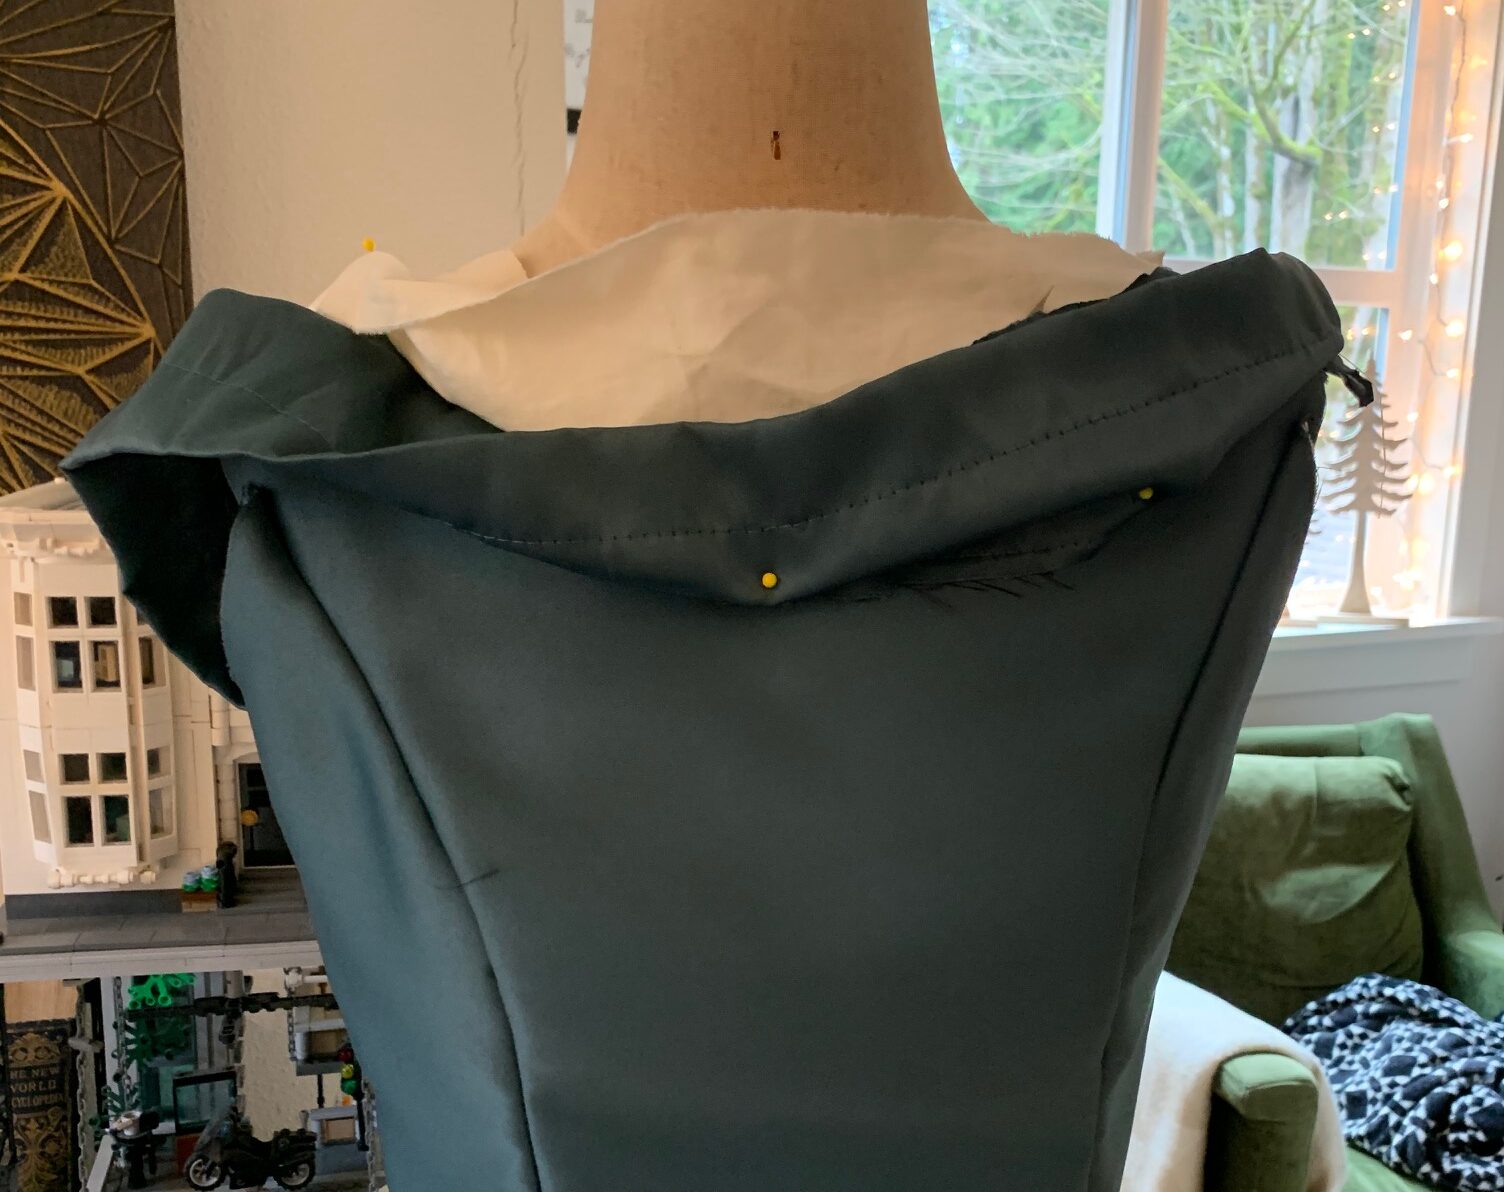
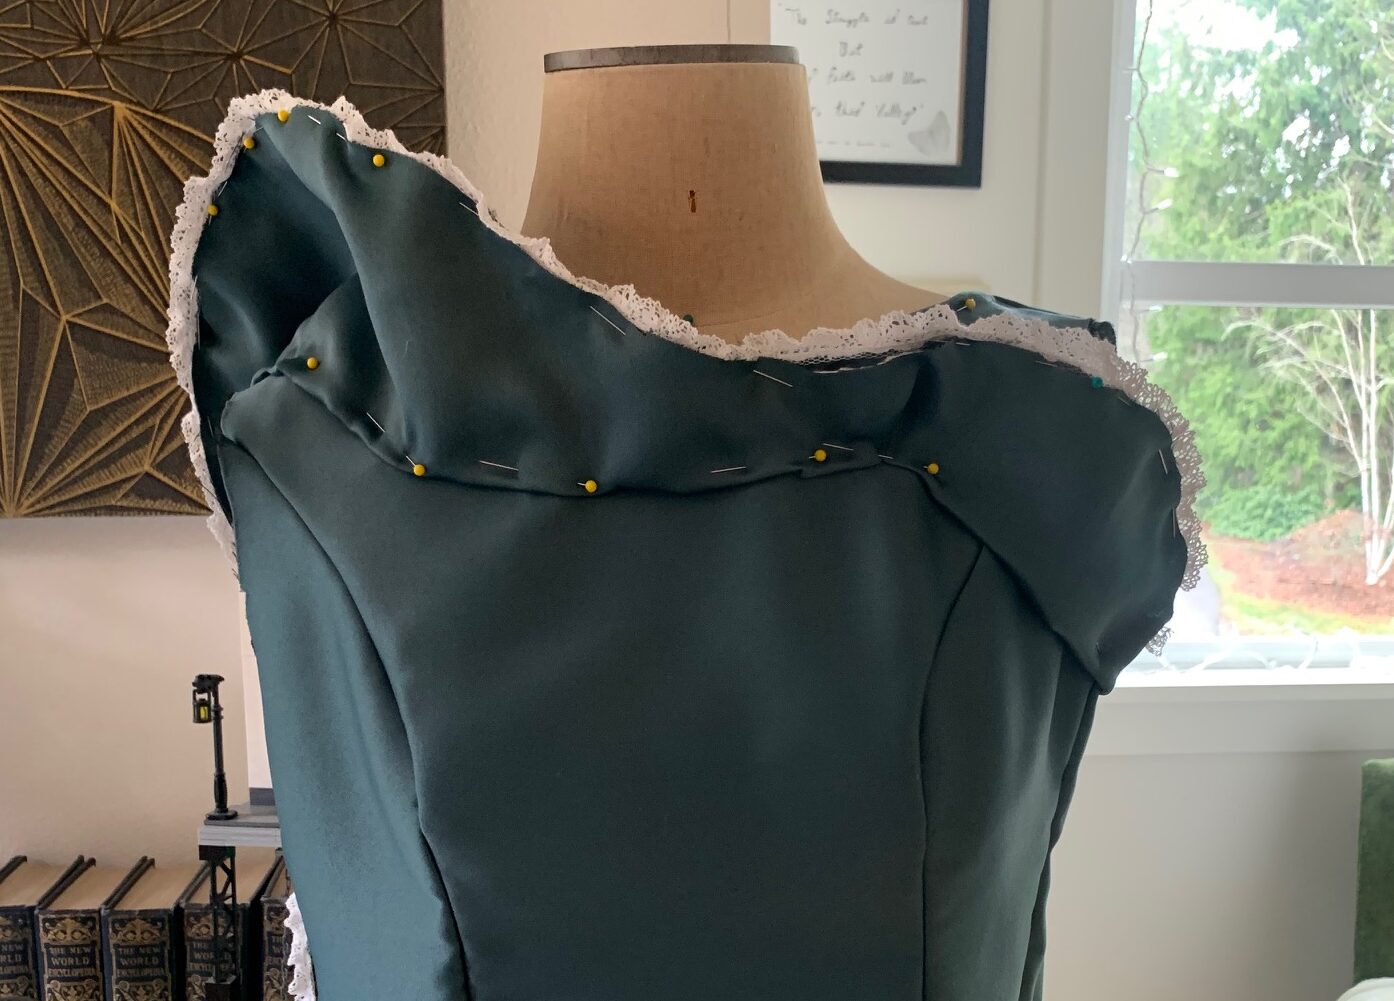
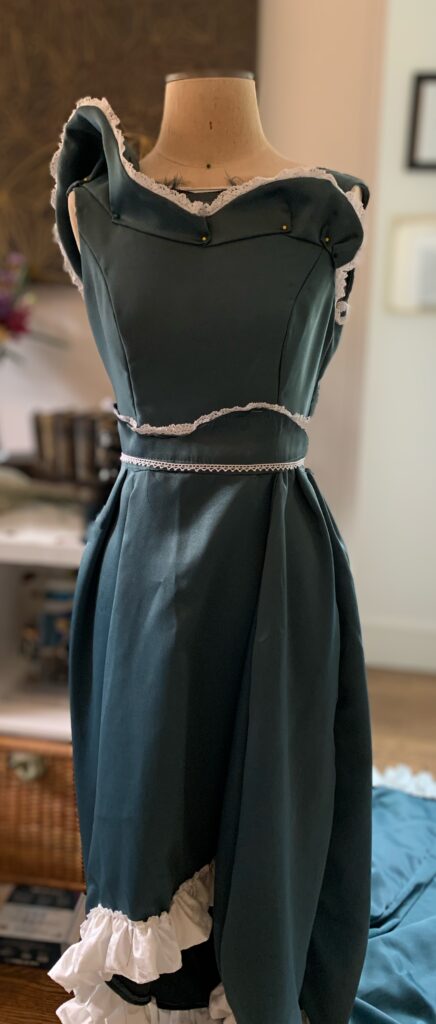
The final element of the dress was the wave that would run from shoulder to shoulder. I played around with it for a while because I couldn’t decide if I wanted there to be waves in different shades of blue and white, or if I wanted to do a singular wave. I tested a few different options (as you can see in the pictures on the left or above on a phone screen) and in the end decided I liked the singular wave best. To create the pattern I took a few measurements (the shoulder to shoulder, and the height I would like it to be). I then drew it out and placed it on my dress form to see if it looked right. It did.
Making The Dress
For this dress I had a deadline. The day I bought the fabric I told my siblings my idea. My brother (ever the genius) said “Why don’t you take it on our trip to Hawaii and take pictures there?” I thought this was a great idea. The trip was only a month away and I had just started a new job, so I knew I had better get to work.
I began with the bodice. I decided to make the bodice two layers thick for added support (the main material on the outside and a layer of light cotton fabric on the inside). The moment I cut into the thrifted fabric, I realized there was a complication. The fabric was thin and prone to fraying… extreme fraying. After doing some research I discovered the curtains I had bought were from a low quality store. At this point, I considered stopping the project because why spend all that time making something that could possibly rip the moment you put it on?
In the end though, I decided to keep going and add in extra preventative measures to stop the fraying and reduce the risk of ripping.

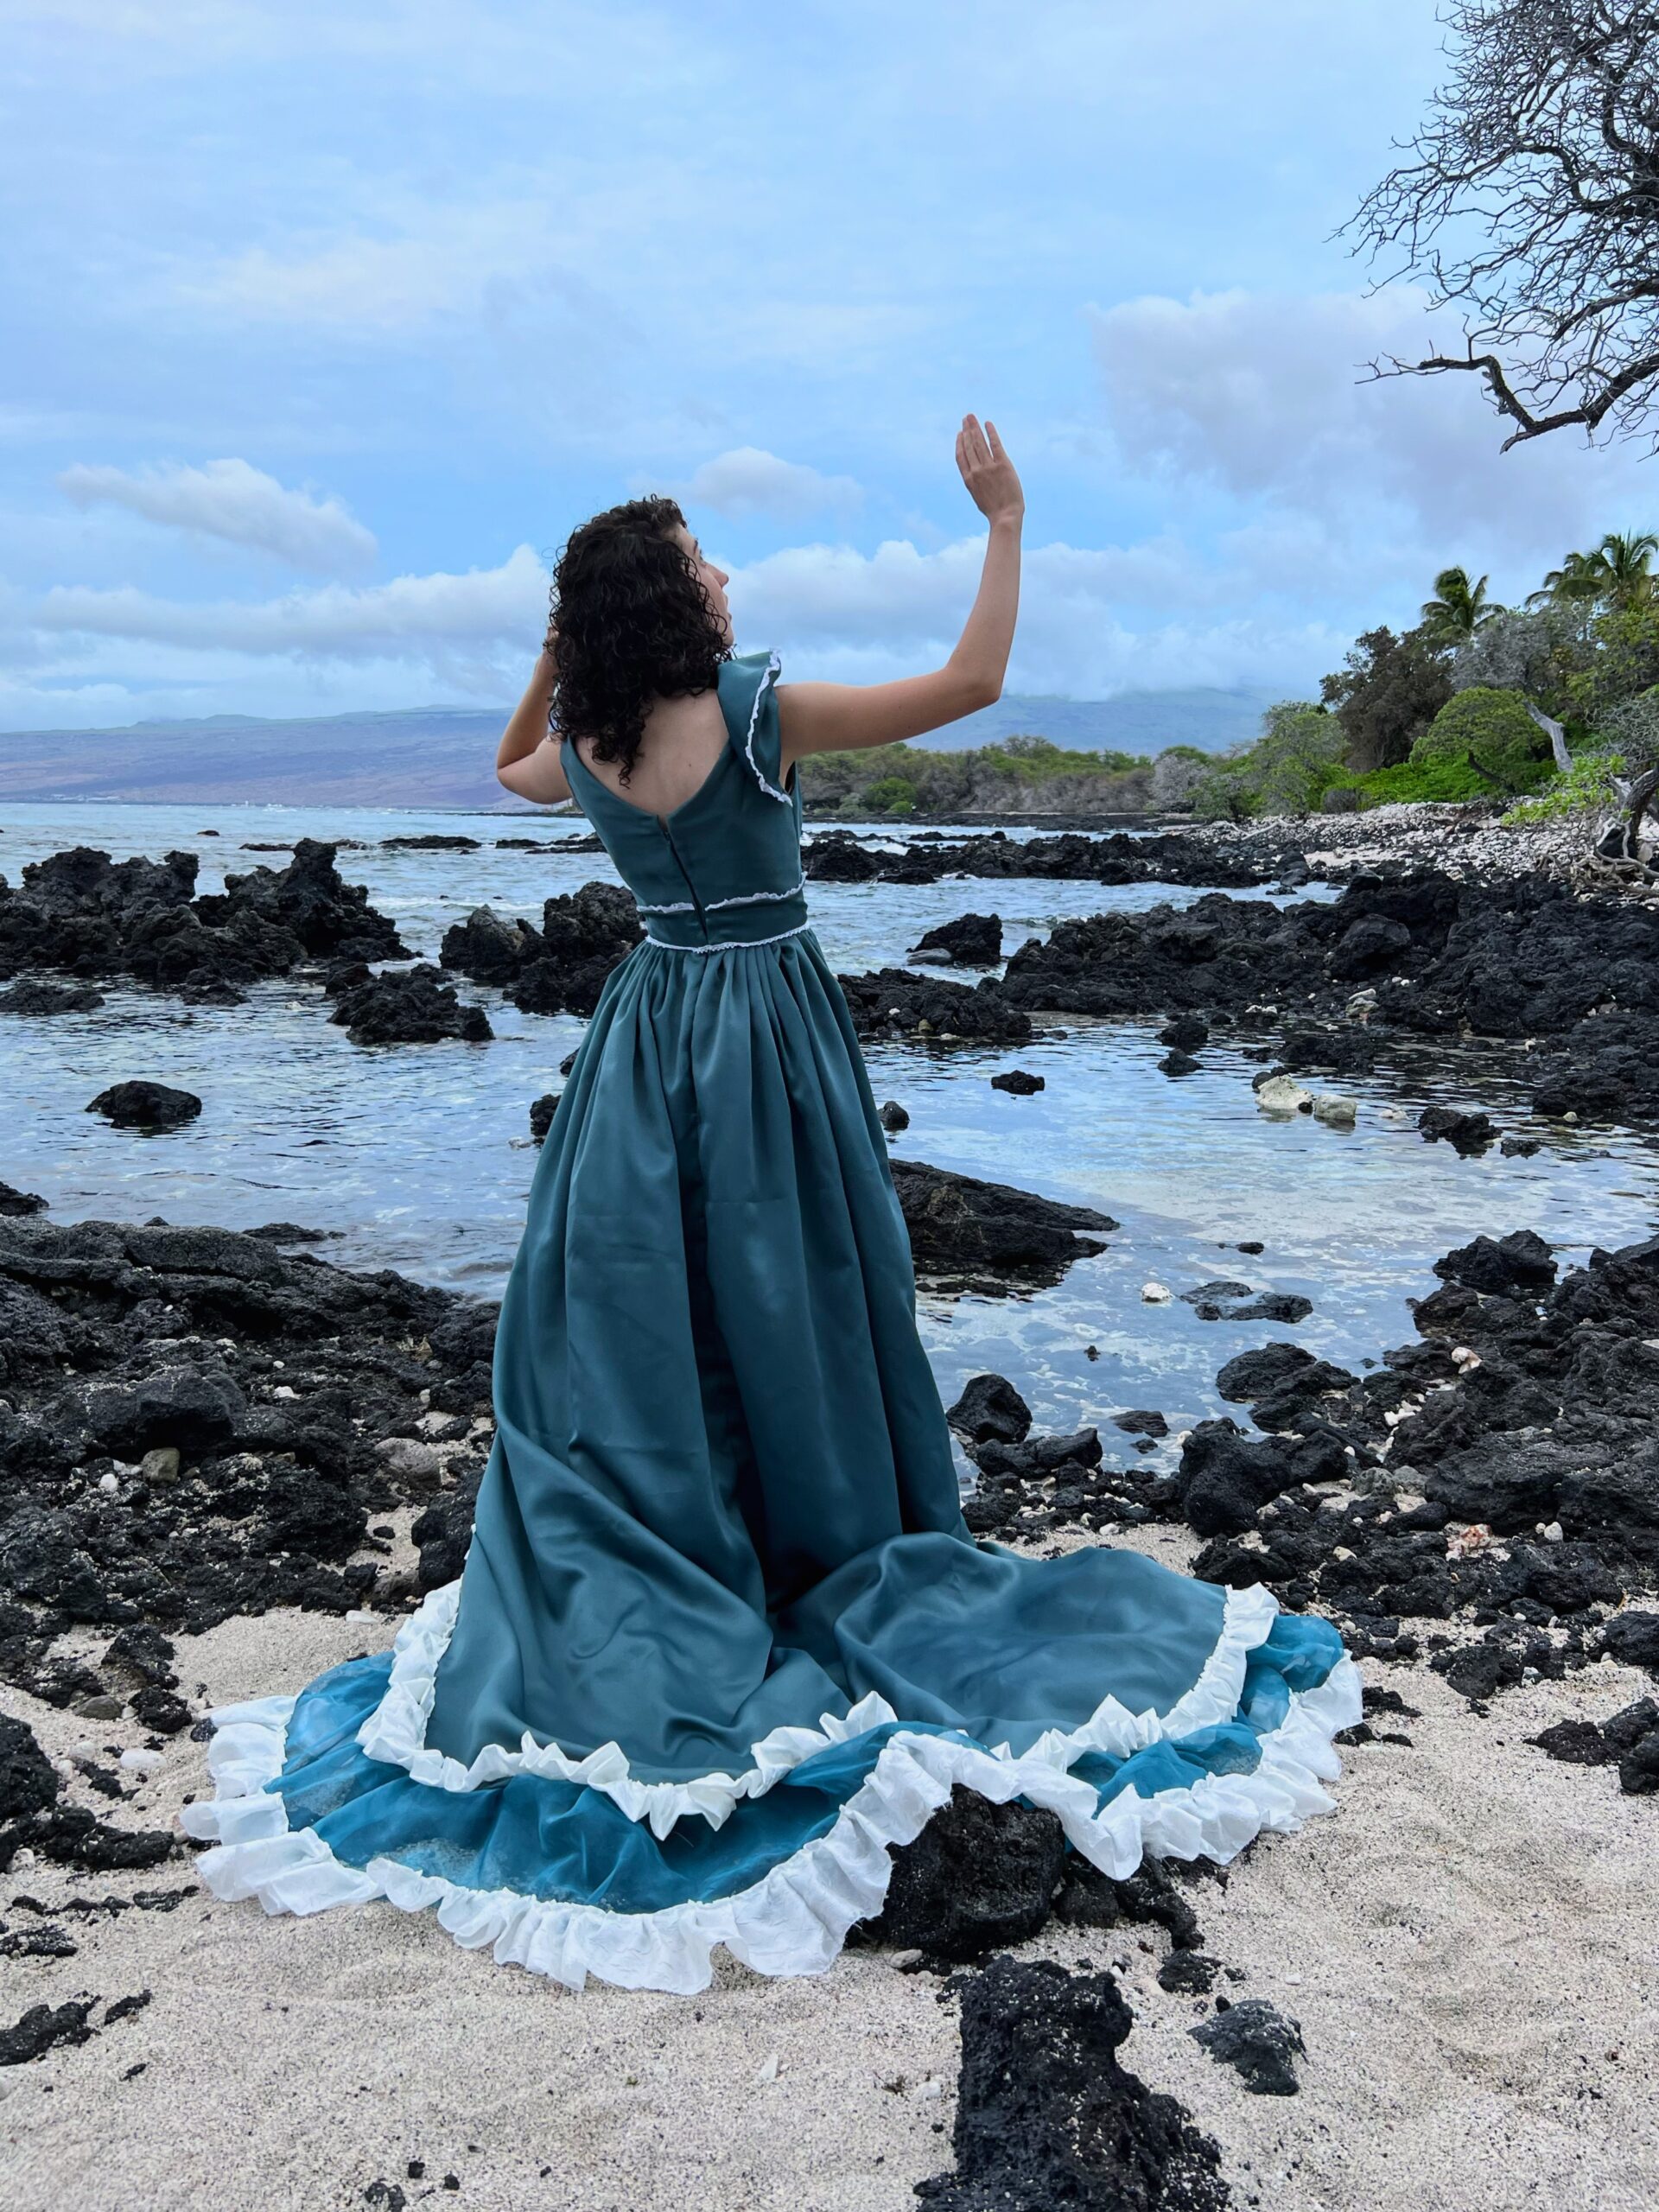
Once the bodice was assembled, I moved on to the skirt. For the front of the skirt I made three panels. The first panel was a short trapezoid that was located at the very front of the skirt. The other two panels went on either side of the first panel and were also trapezoids. Instead of cutting the bottom hem of these straight across (like I had done for the center panel) I cut the two at an angle to make for a smooth transition between the front panels and the train of the skirt. For the train I sewed two more (very large) panels to each of the side panels, then pleated the large panels. I attached the pleats to a strip of white cotton fabric cut to perfectly fit my waist. Once the pleats were sewn in place I sewed the back two panels together, leaving room at the top to attach a zipper. Then, I sewed the bodice and skirt together.
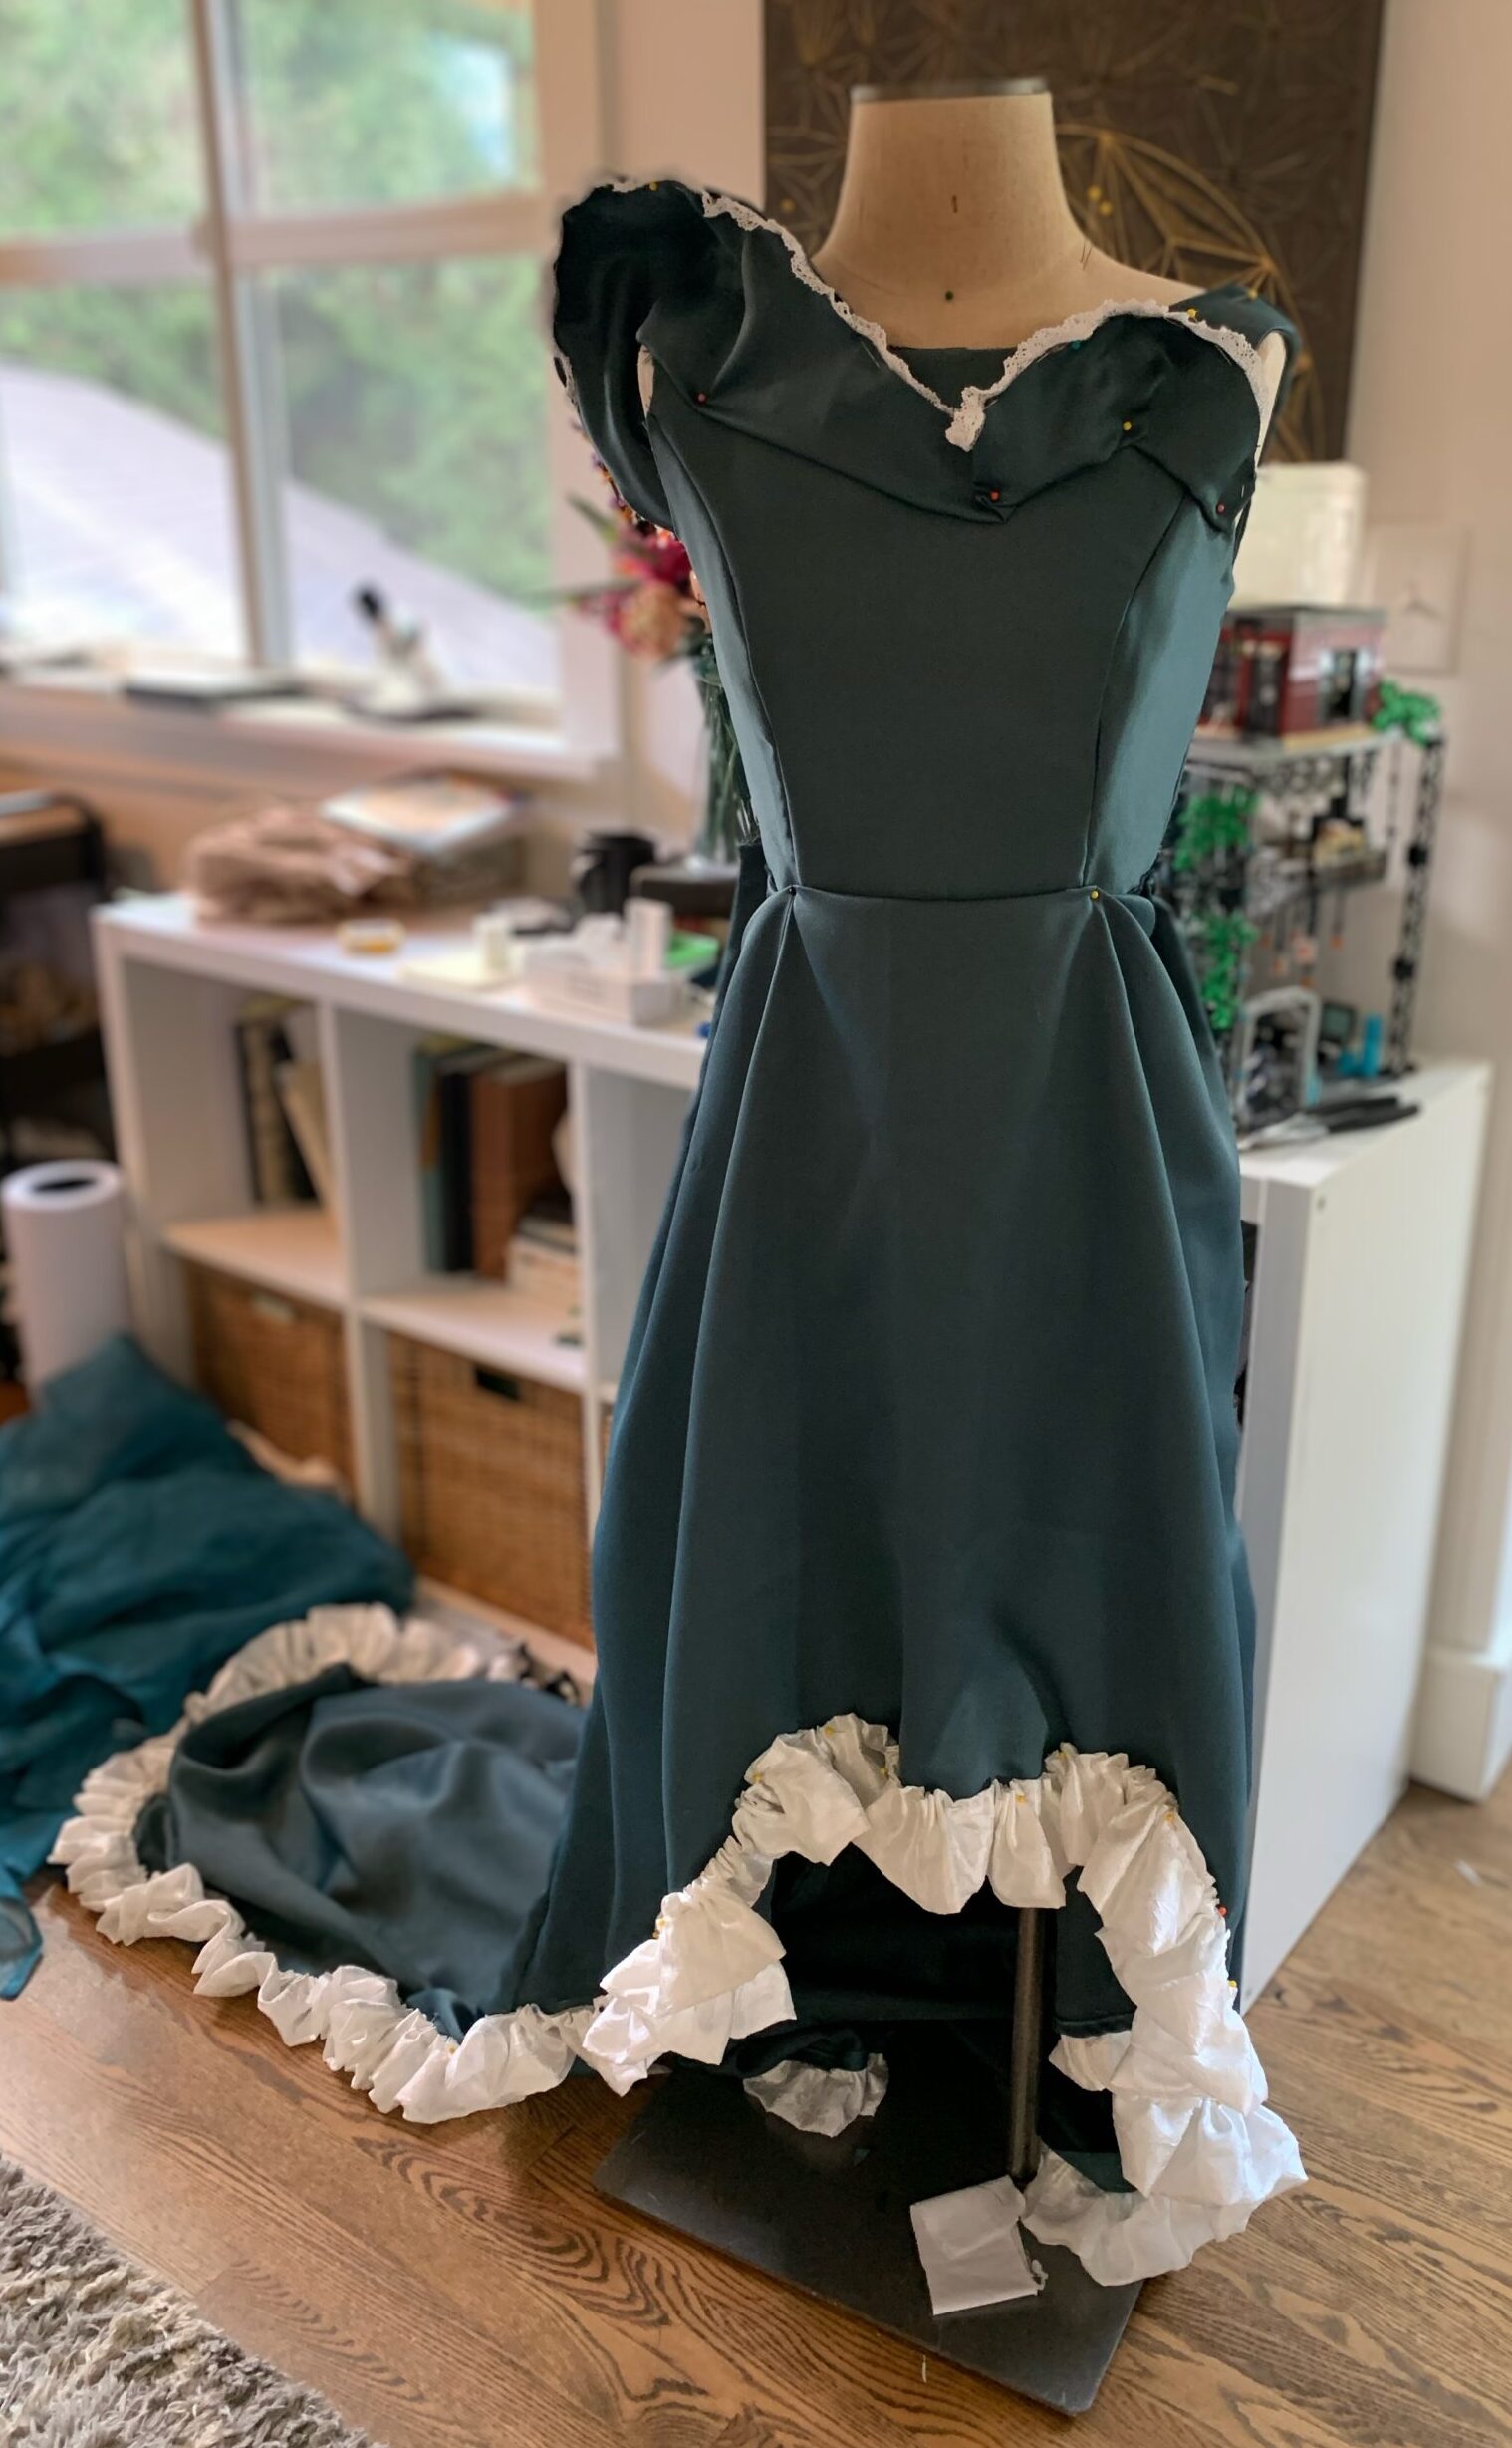
At this point I was nearing the deadline, but knew I had to add the wave elements to it. I started with the frills that would trim the skirt. To make the frills I cut a white curtain into strips and sewed the strips together (this was a pain because my sewing machine wasn’t happy with the fabric material… I ended up changing the needle and that helped but it was still difficult… oh and did I mention that the strip ended up being 45 feet long when I finished sewing all the pieces together?) After the strips were sewn together, I gathered the strip using a gathering stitch. When the frill was gathered into the correct length, I attached it to the dress.
Now it was time to move onto the details.
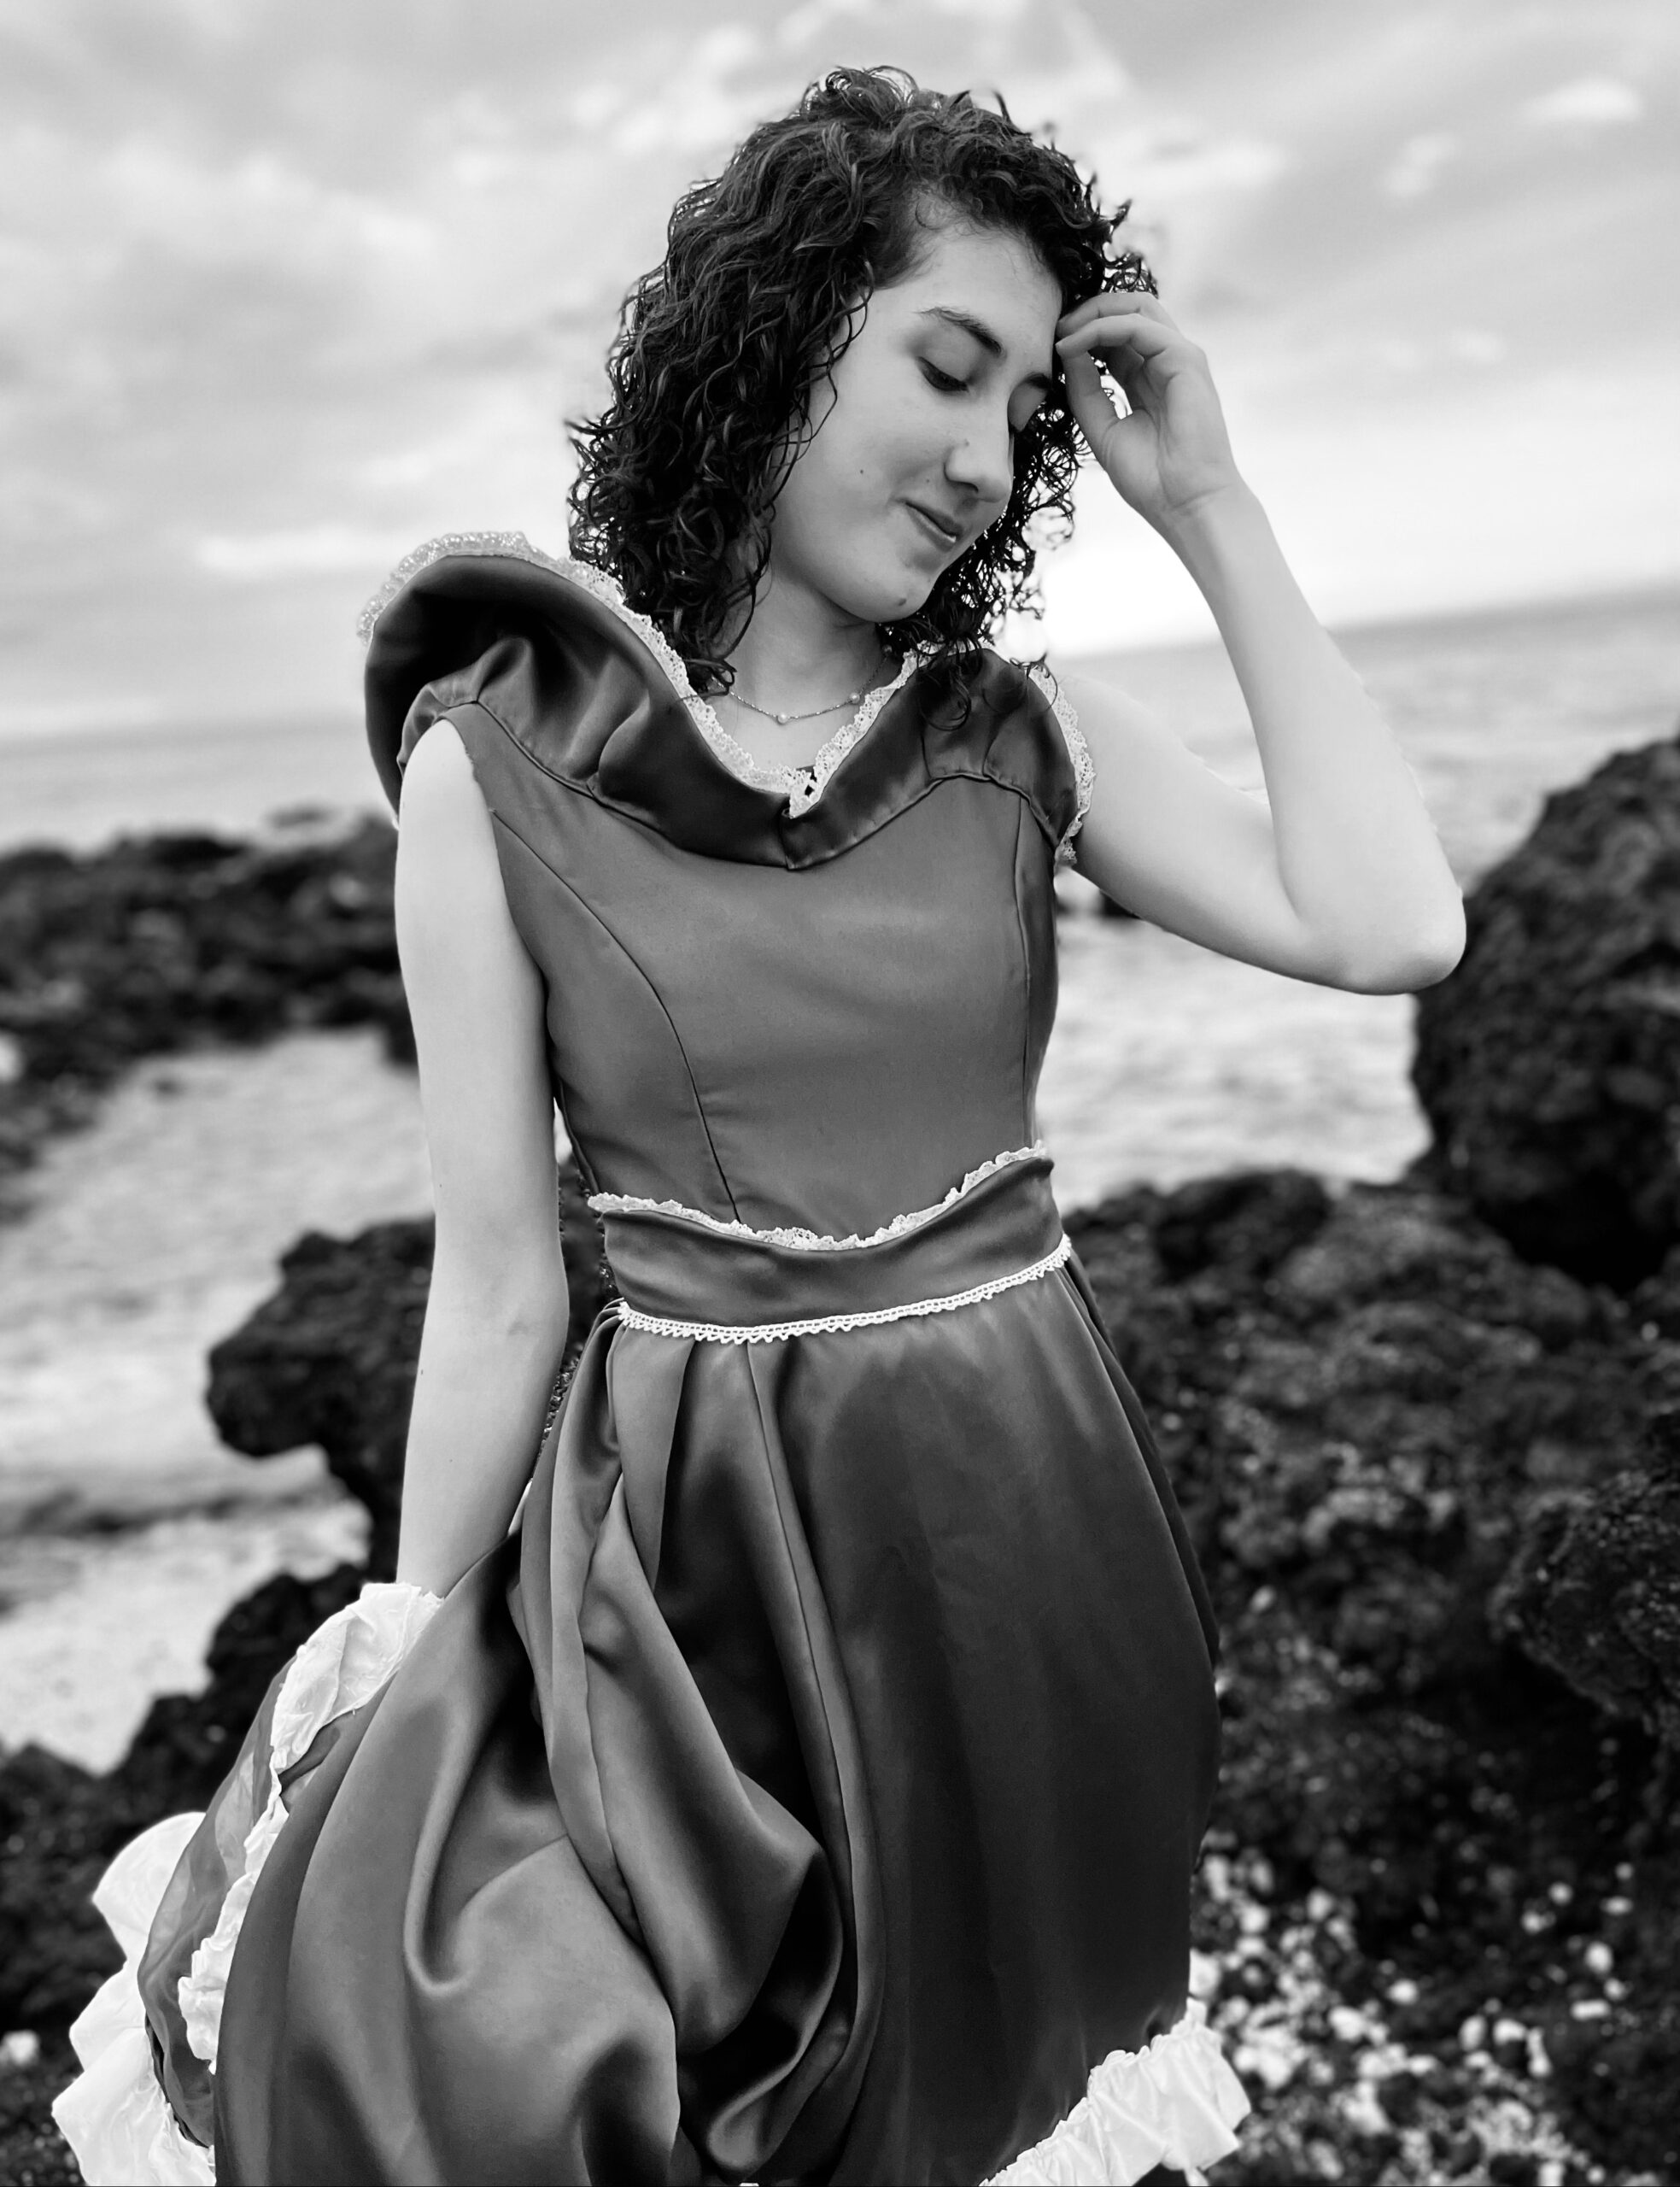
There were two additions I made to the dress at this point. The first was a waistband. Once the bodice and skirt were sewn together I was able to take a step back and look at the dress and I realized something was missing. So, I experimented a little and decided to add a lace lined waistband to the dress, (Pictured on the right or below on a phone screen). This pulled the whole dress together and helped it feel more cohesive.
The second thing I did was line the inside of the skirt with some lovely blue tulle(ish) fabric that I had found at the thrift store on that fateful day. 😆 I really loved the fabric and had been trying to find the perfect way to incorporate it into the dress. I was considering doing it over the skirt, but after pinning it underneath the satin fabric, I realized it looked better underneath the skirt. To make the tulle layer, I simply sewed the two curtains together and cut out a waist, I then pinned it to the skirt and trimmed it so that it lay the way I wanted it to. I still wanted the tulle to show, so I cut it 4-5 inches longer than the overskirt. Once it was cut to my liking, I attached the second frill to the tulle.
After that, I (finally 😁) attached the shoulder wave to the bodice (I had only pinned it on times prior).
Having finished the dress I stuffed it into a large suitcase and the next morning headed off to Hawaii.
The Finished Product and Photo Shoot
I had really wanted to do the photoshoot on a black sand beach. It felt like the perfect backdrop for the dress, but (sadly) some problems arose. The first problem was the fact that the beach was halfway around the island, which meant that I only had one shot to get the photos. No pressure, right?
When we arrived at the black sand beach I realized there was a second problem; it was windy… very windy. This meant that my hair kept blowing in my face and the dress kept billowing around me in weird ways. We still managed to get some photos, but when we got back to the rental and I looked at them, I realized they were very grainy and blurry…
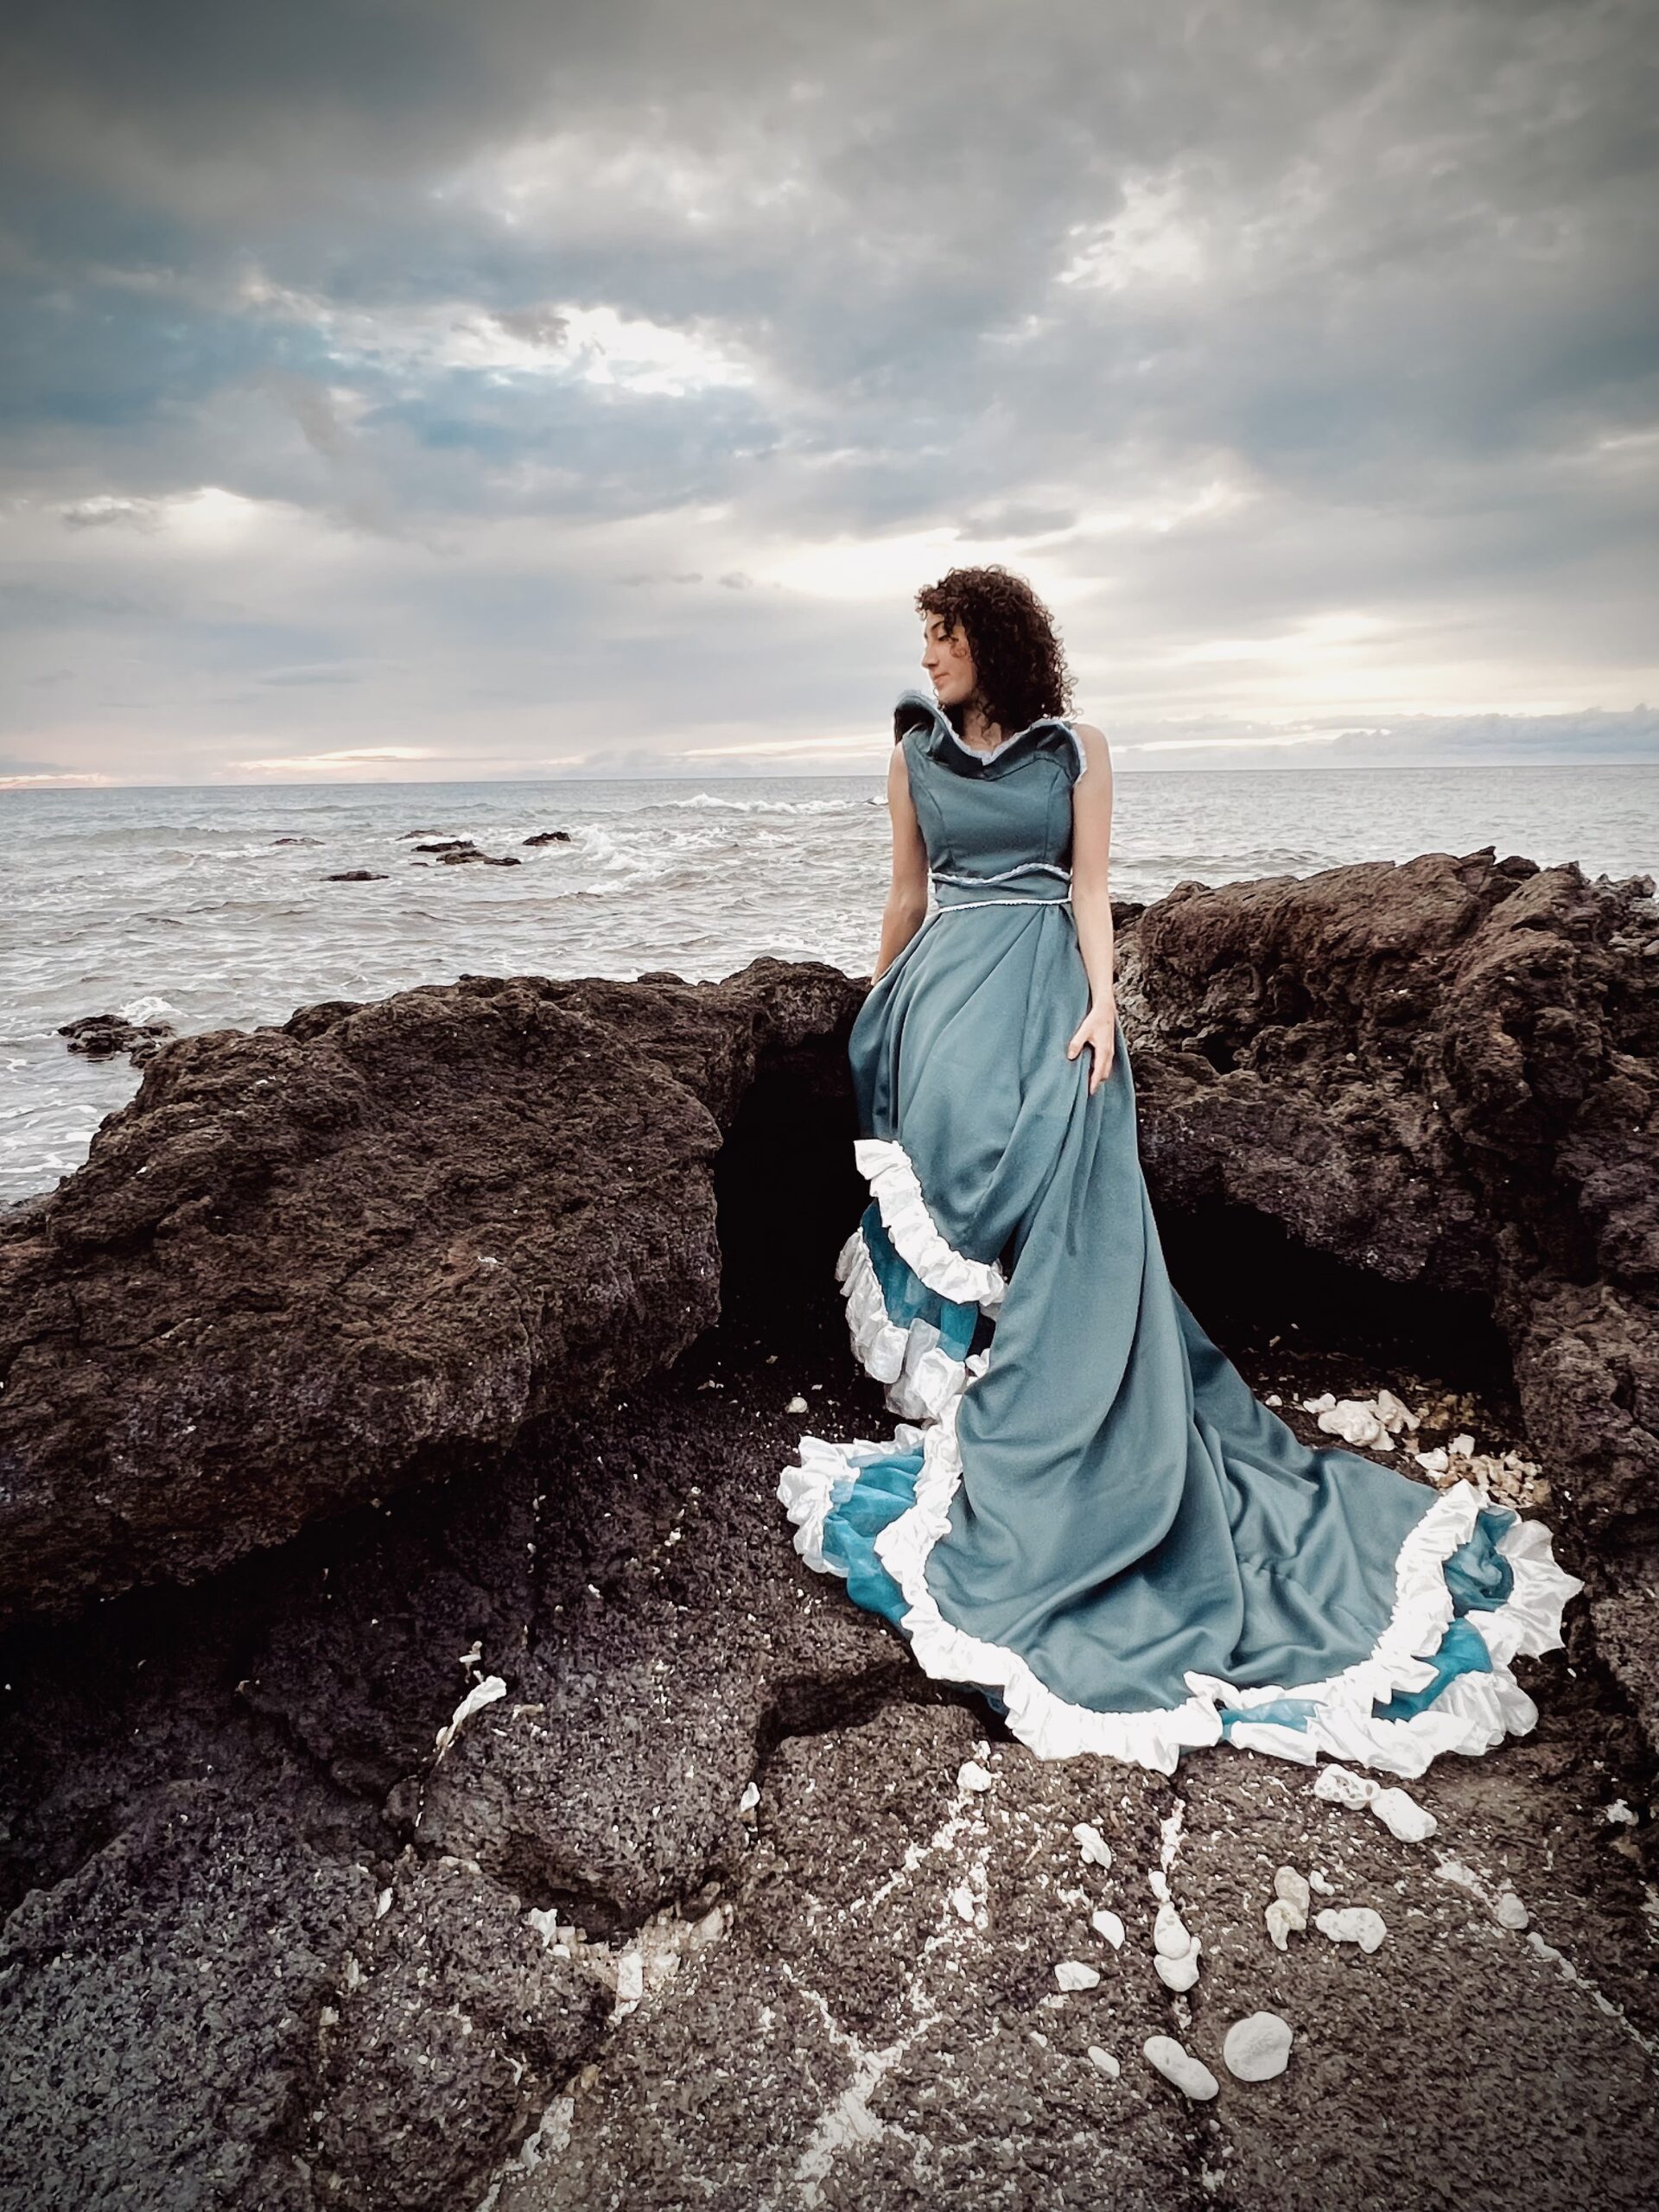
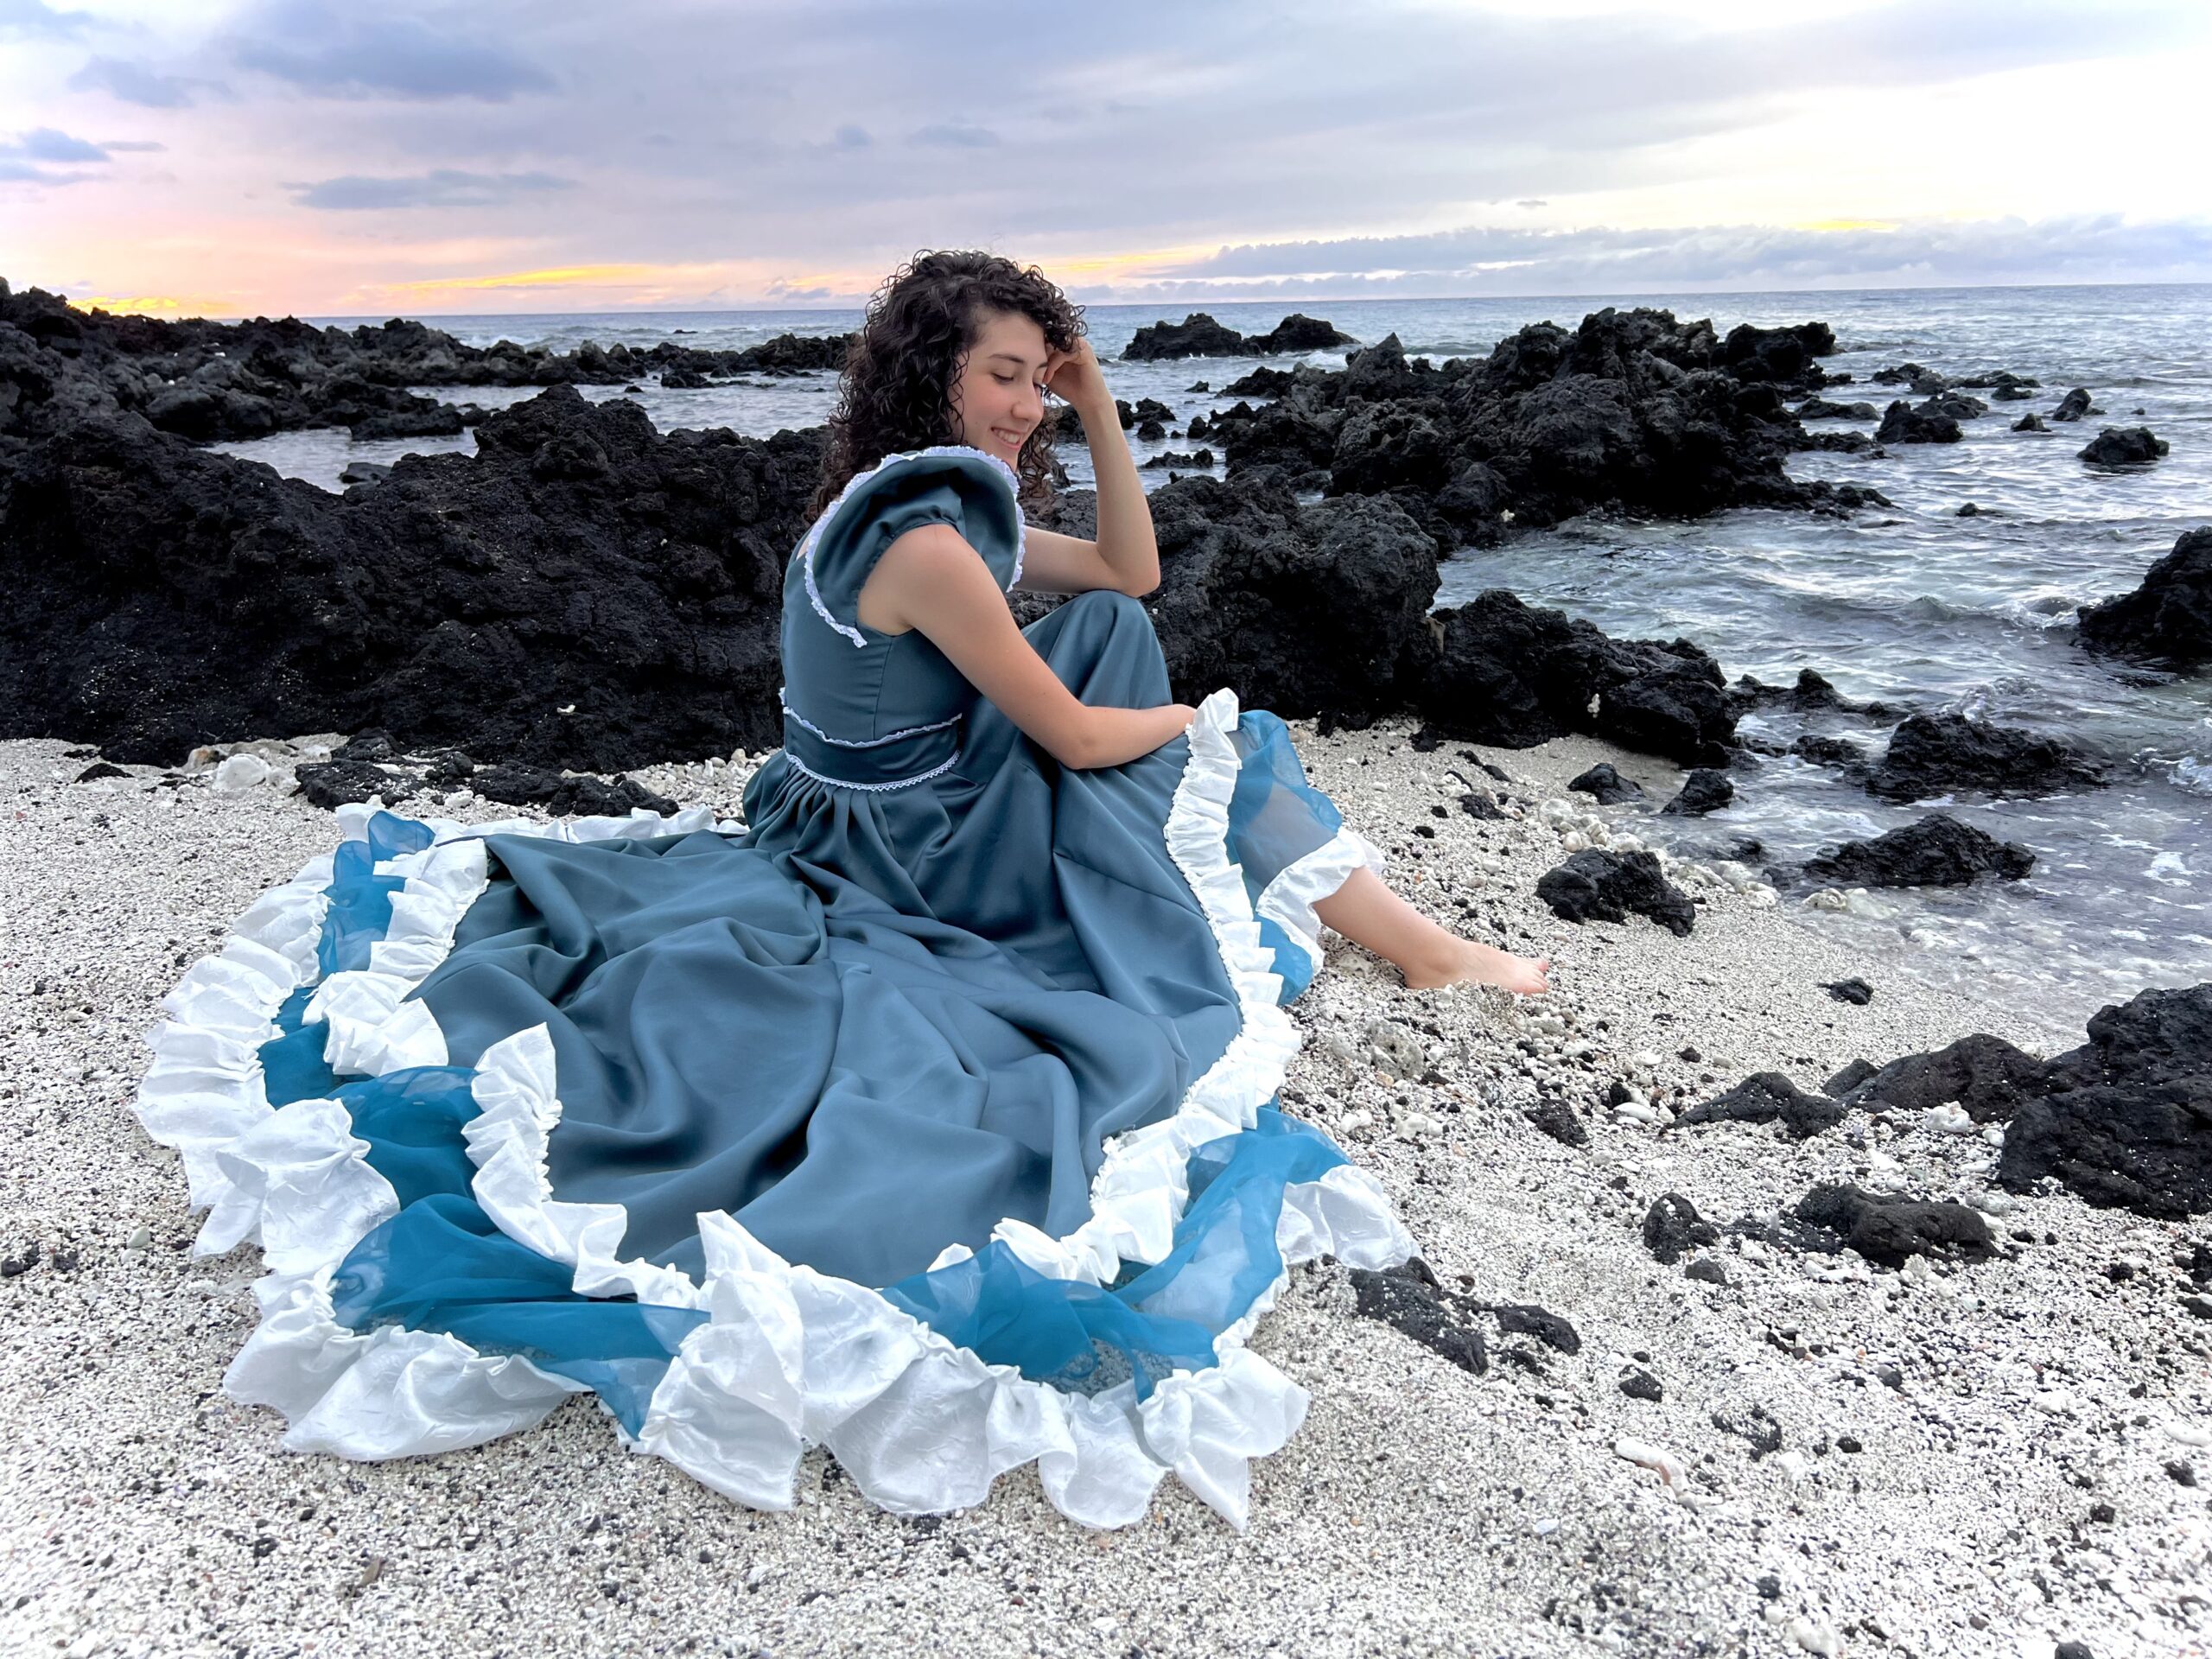
So we went with plan B: completely scrap the black sand beach idea and instead take the photos at a beach only a minute away. This plan worked way better than the first one, for I was able to do my hair the way I wanted (give it the “curly wet” look), and I didn’t have to deal with strong gusts of wind.
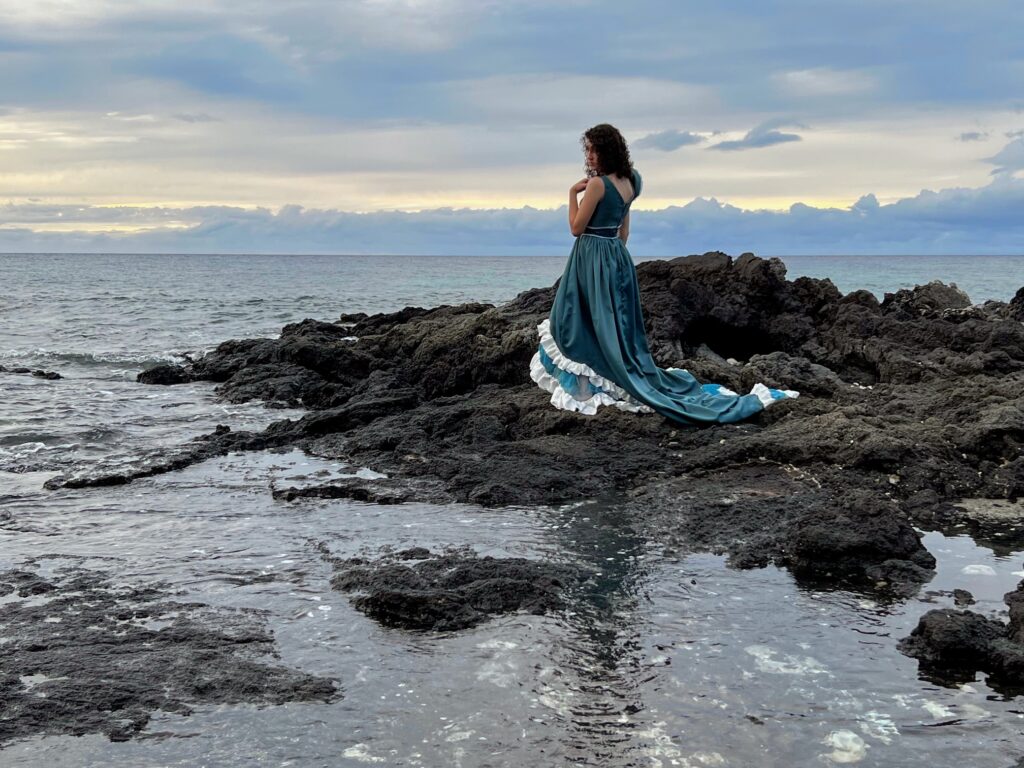
We arrived at the beach right as the sun was setting. Talk about a storybook setting! The sky was beautiful and the lighting was perfect! The beach even had some gorgeous black lava rocks that added contrast to the photos! All in all, I’m so happy with the result and a huge thanks to my mother for taking the photos.