

Hello ladies and gentlemen! I felt like it was high time I shared one of my sewing endeavors with you all, so this post is going to be about how I made a regency era Spencer.
First off, let’s talk a bit about Regency Era fashion.
The Regency Era was from 1811-1820. The fashion of the time period is very distinct. Most women wore light colored dresses with extremely high waistlines. The fashionable silhouette of the time was simple yet elegant, (contrast that with an 1860’s gown — or walking dress— and you’ll see what I mean). If you have watched a movie adaptation of a Jane Austen novel, you have seen regency fashion.
A Spencer was a small coat that was worn over the dresses to add warmth. The Spencer was high waisted (aka, cropped) to match the waistline of the dress and give the silhouette that was desired.
Making a Spencer
To make the pattern for the Spencer I decided to drape it. Draping is when you put fabric on a dress form and draw out the pattern on that fabric. Once the pattern is drawn, you remove the fabric and cut out the pieces and that is how you get your pattern.
The front of the Spencer is a princess seam, which — because I’m still pretty new to sewing — seemed daunting to try and draft as a paper pattern. What’s more, the dress form already had the outline for the princess seam which made the draping even easier.
The first and second pieces of the pattern (shown on the right on a computer and below on a phone screen) make the front of the coat. The third piece is the back. Two of each pattern piece are needed to make the full jacket.
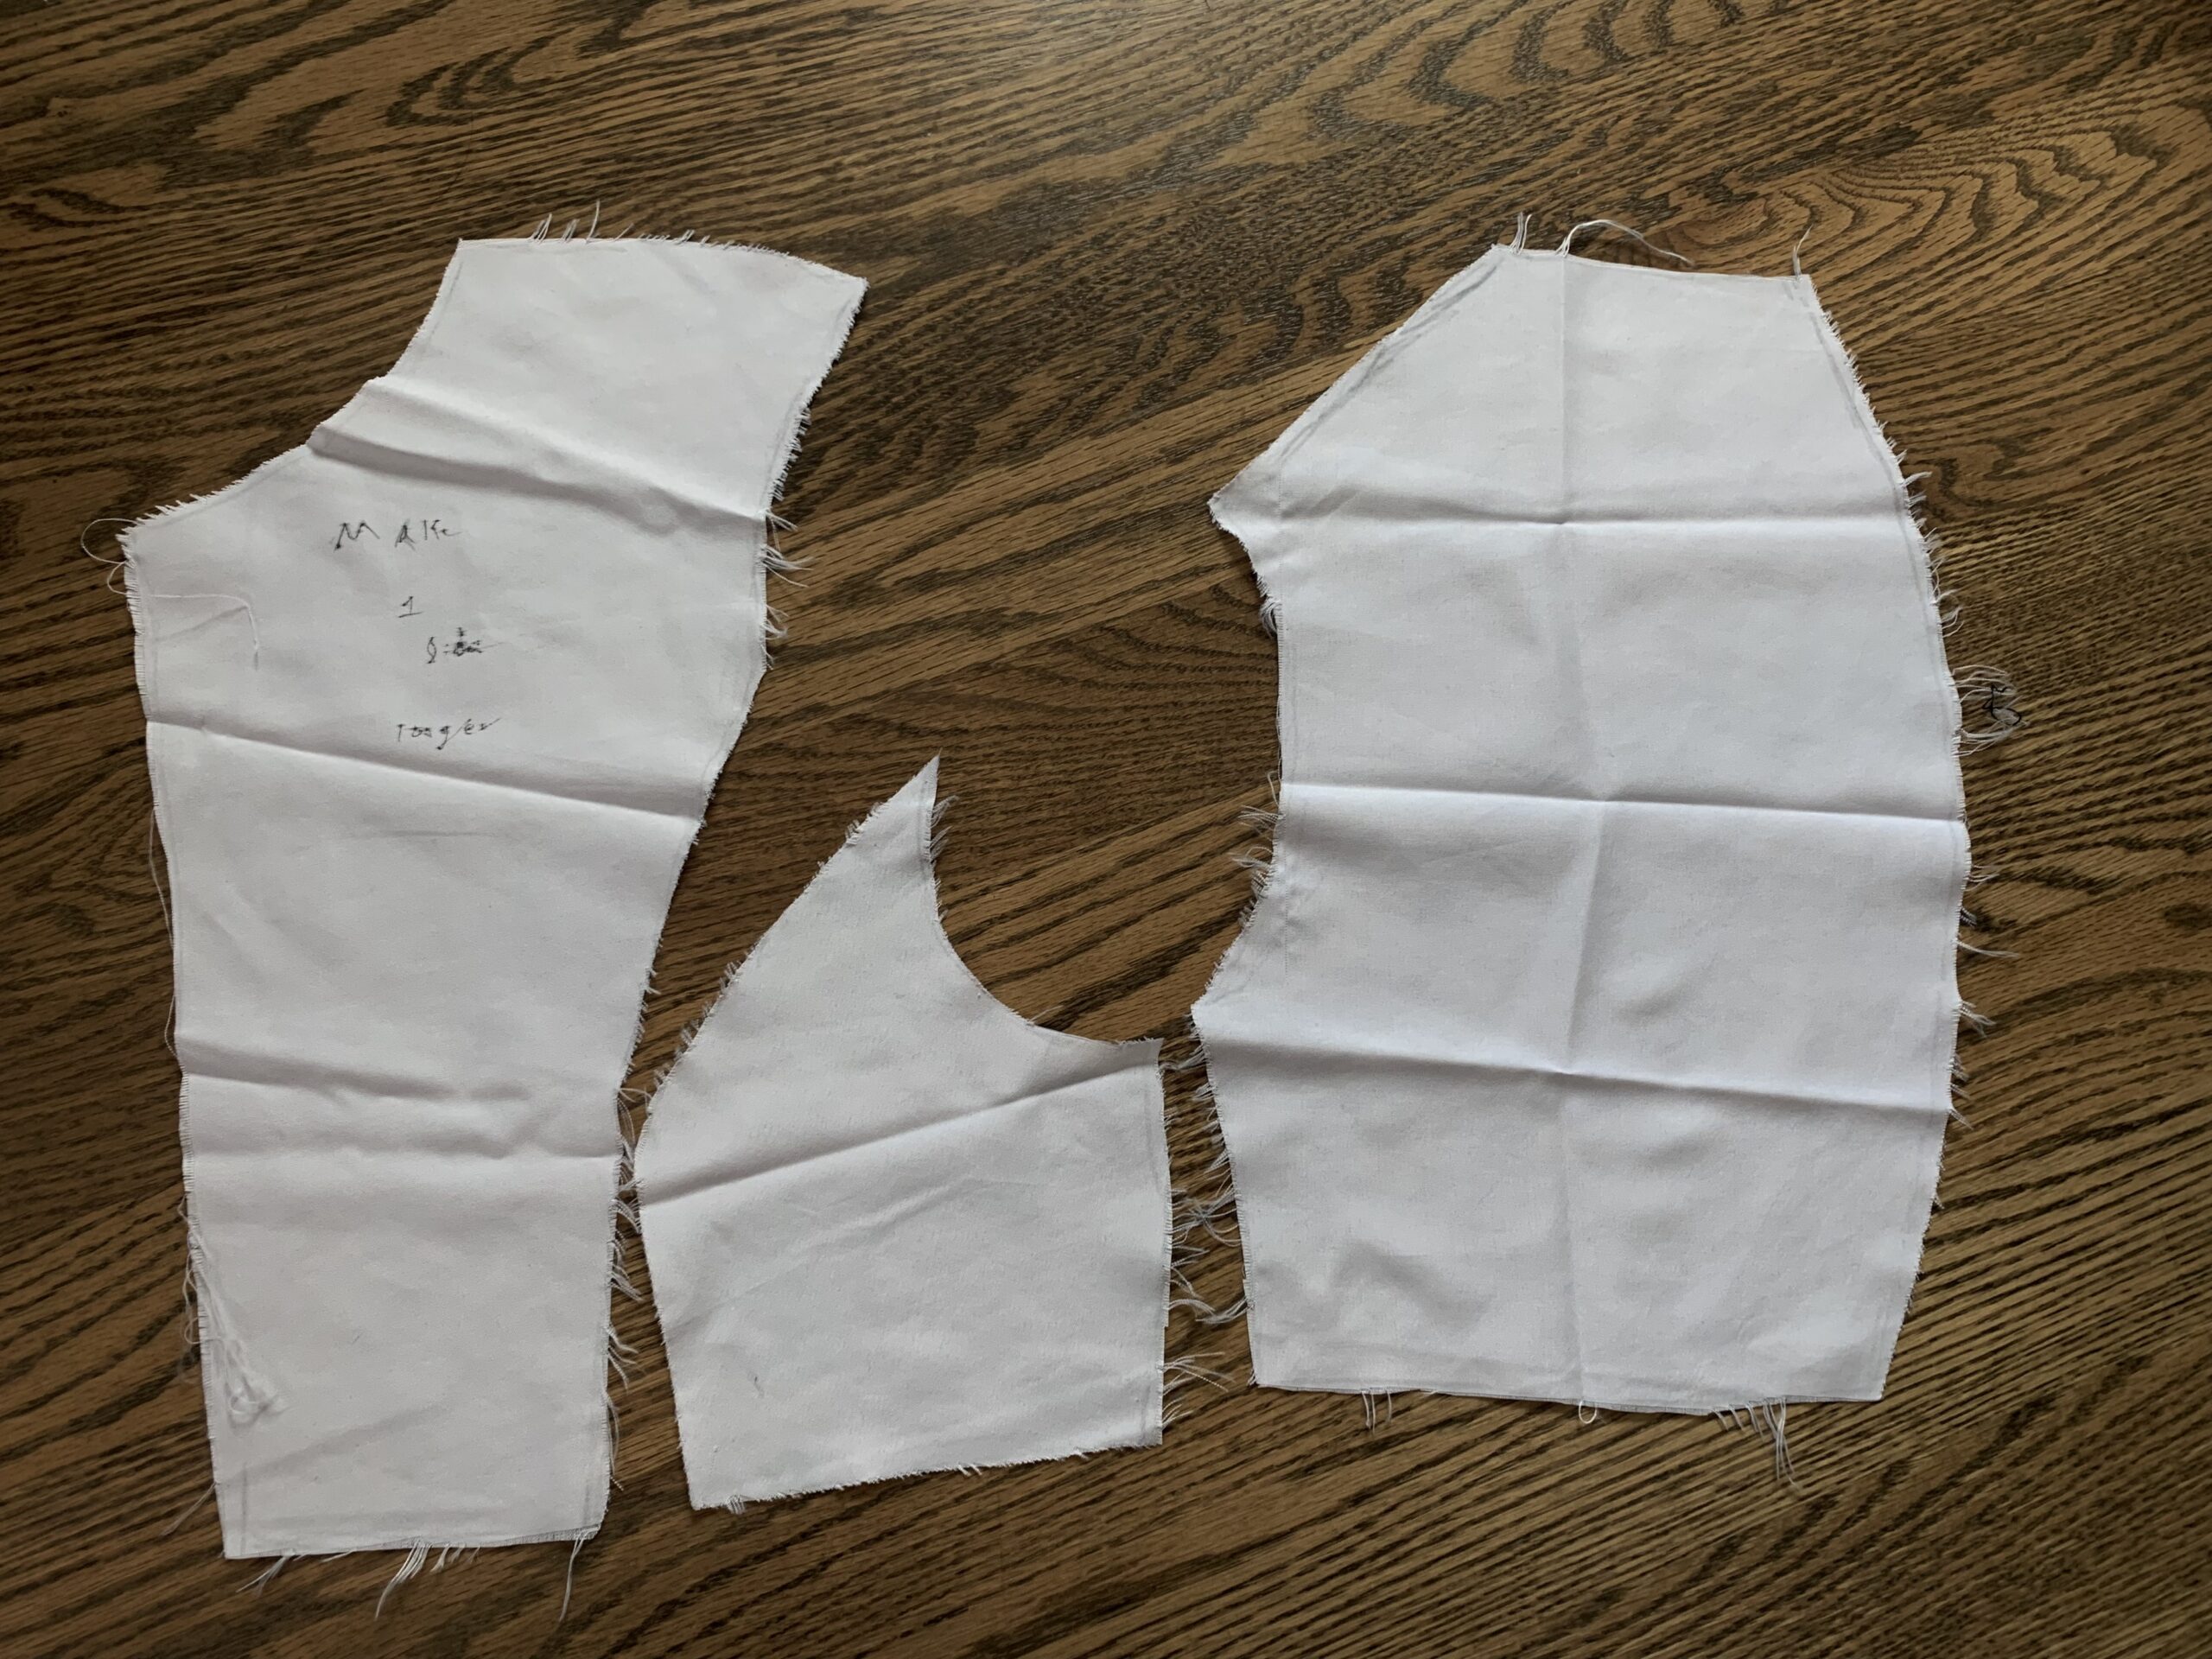
(A princess seam is a seam that is created when the first two pattern pieces shown above are sewn together. The specific shape of the seam makes the garment more form fitting. It is often used for dresses.)
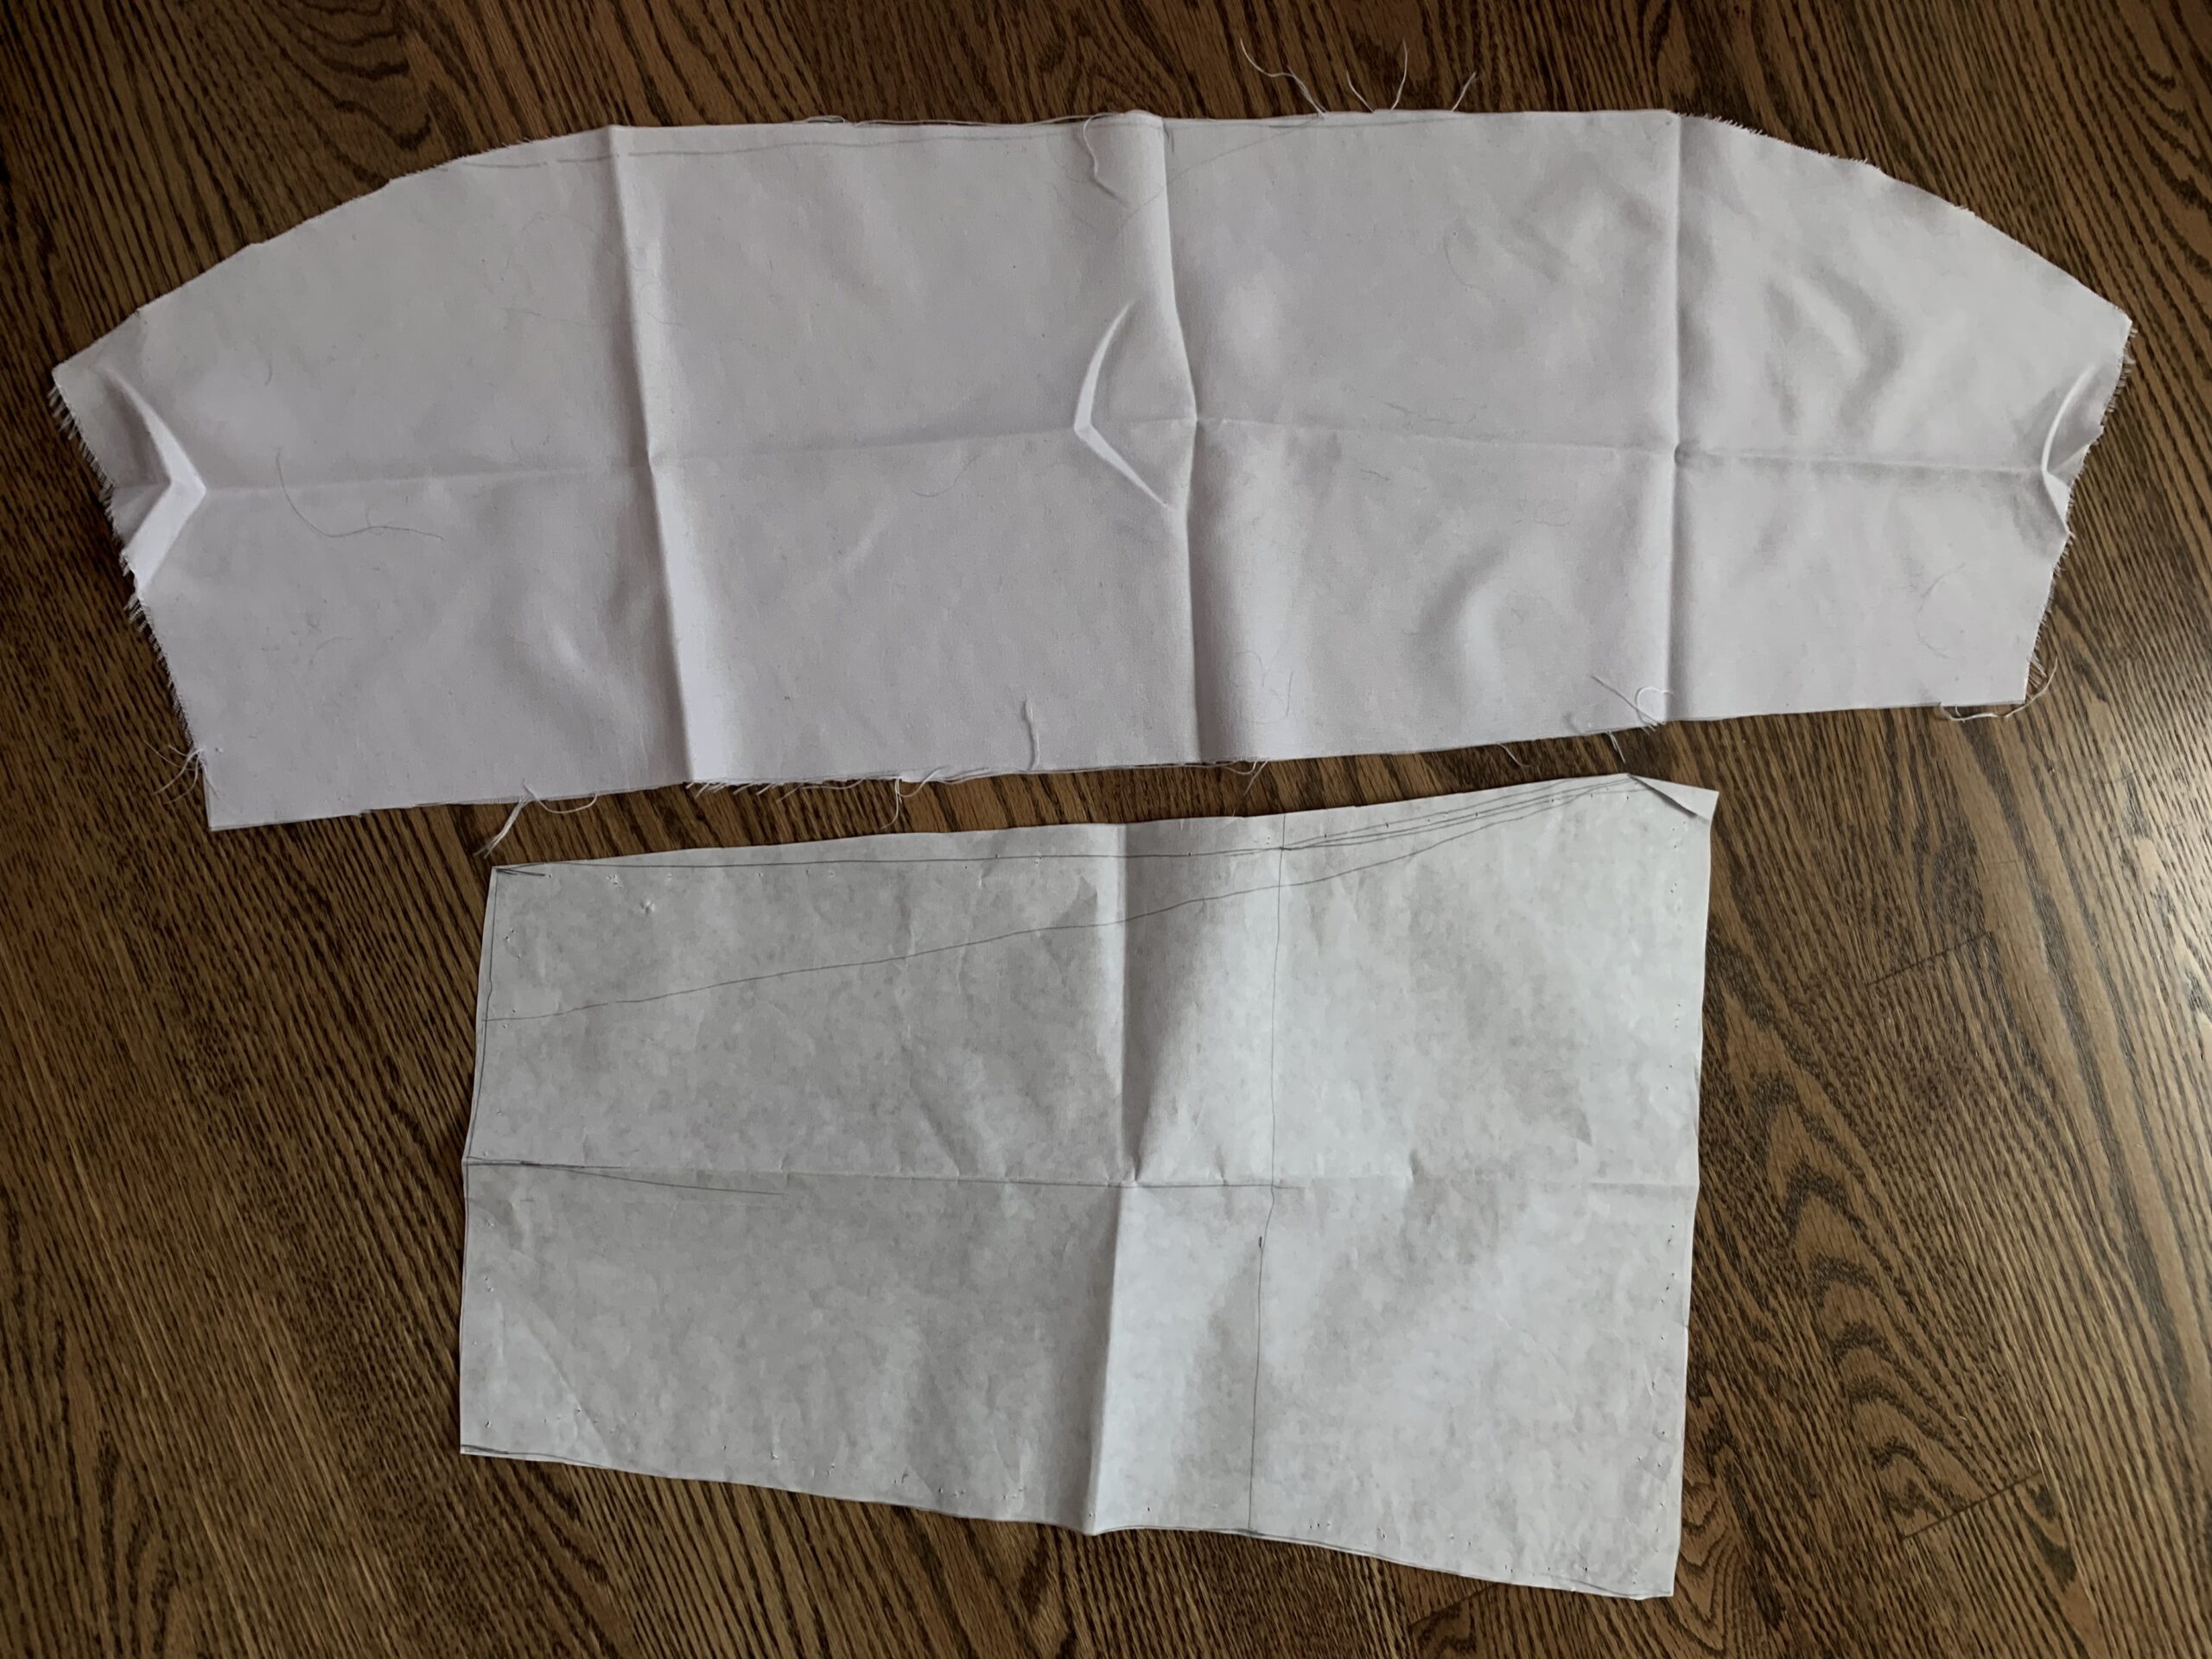
On the left (or above on a phone screen) is the pattern for the arm/sleeve. A lot of pictures and paintings I saw of Spencers had voluminous (for lack of a better word) shoulders. So, I decided to do the same. To make the voluminous shoulders I cut out large rectangles that had a slight curve on one end (see the upper pattern piece). The second pattern piece is the rest of the sleeve.
There are two pattern pieces I didn’t take pictures of. The first is just a large strip of fabric that wraps around the bottom of the coat. I felt like a picture wasn’t needed for this as the piece is so simple.
The second pattern piece is the collar. I actually couldn’t find the pattern piece for the collar, so I either lost it, or didn’t make one in the first place. 😄
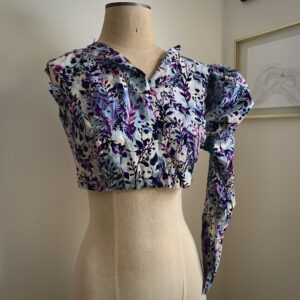
After I created the pattern I made a mockup out of some fabric I didn’t care about. (A mockup is a test version to see if the pattern fits right. Mockups also are the place to make mistakes and learn before starting on to the real garment — this is especially important if you are using expensive fabric.) To the right (or below on a phone screen) is my mockup of the Spencer. I only made one arm because I just needed to make sure the pattern worked.
The mockup ended up fitting how I wanted, so I moved on to the real garment.
The fabric for the Spencer I found at a thrift store, so I don’t know how historically accurate it is (material-wise). It could be some sort of wool, cotton, or polyester… or a blend.

Sewing the actual Spencer took about two weeks, (I used a machine because I don’t have the patience to sew that much by hand). After the outer layer of the Spencer was completed I created an inner layer using some cute printed cotton I had on hand. I sewed the inner layer separately, then pinned and hand sewed it in place.
The last step before the garment was completed was the buttons. I ended up getting some metal buttons at the store and covering them with fabric myself because I wanted them to match the rest of the Spencer perfectly. I also hand sewed the buttonholes… because I wanted to. (Buttons and buttonholes are one of my least favorite things to sew, so I don’t know why I decided to hand sew all of it.)
Once the buttons were sewn on, the garment was complete!
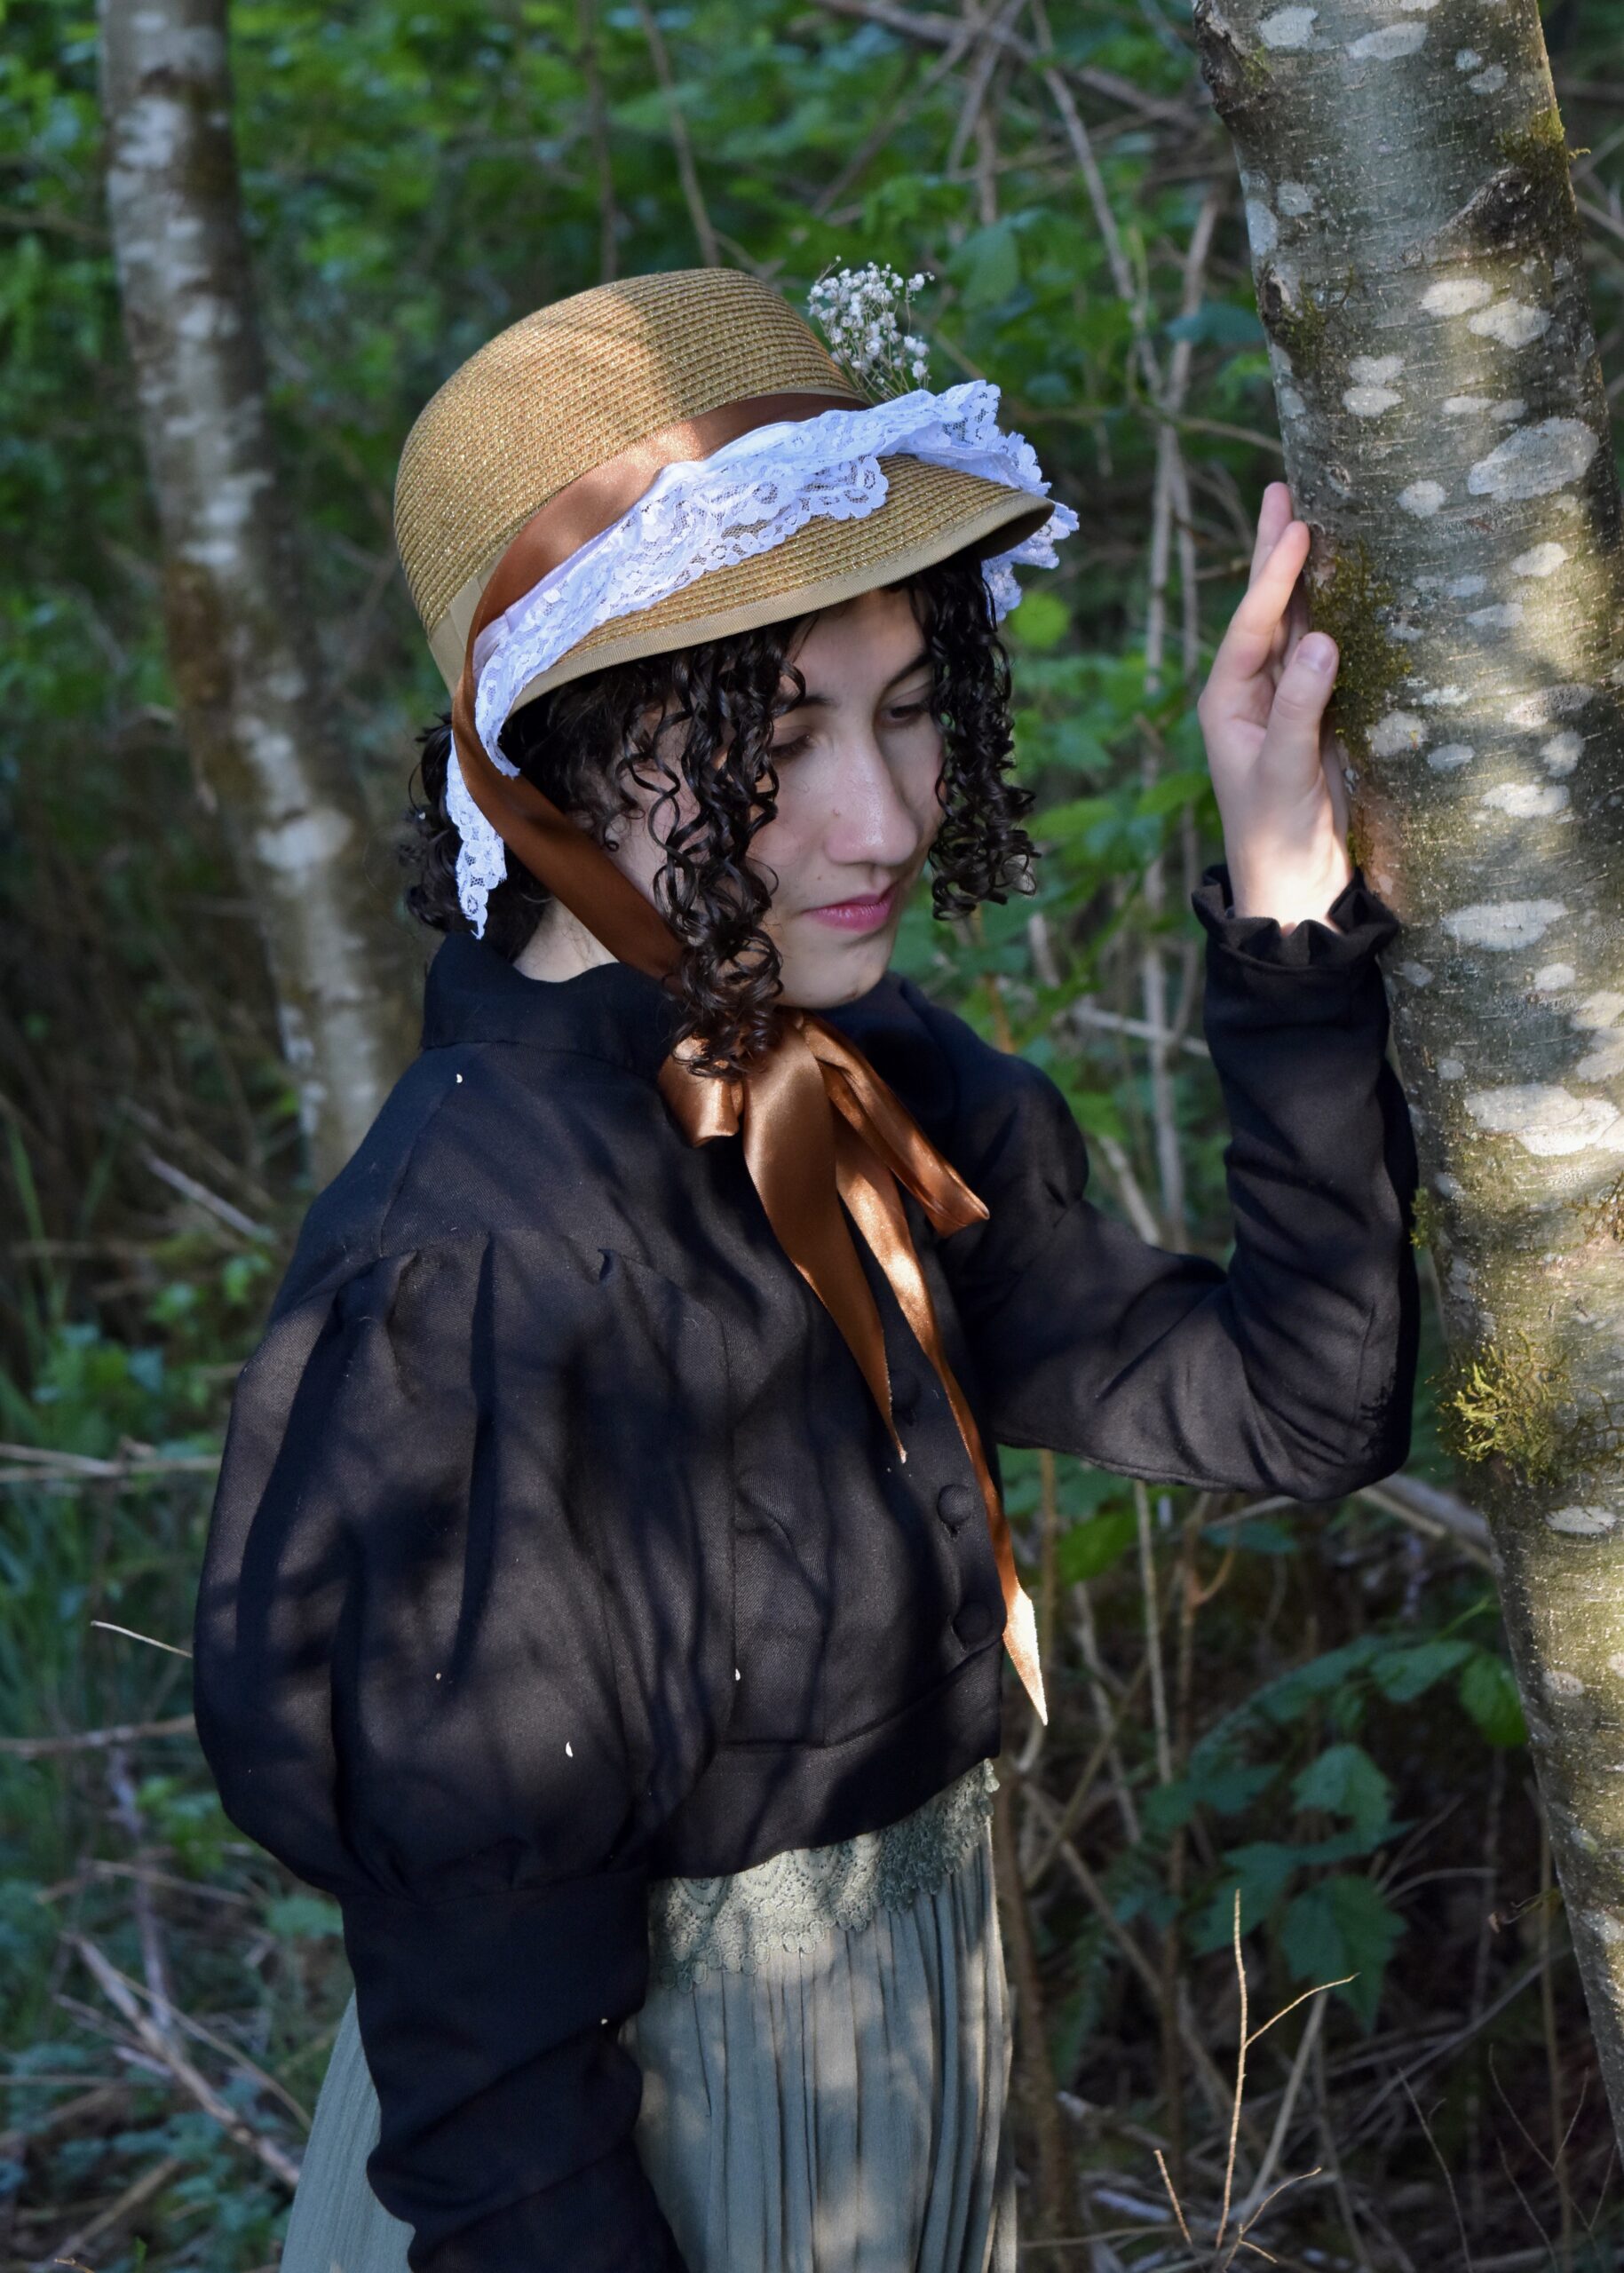
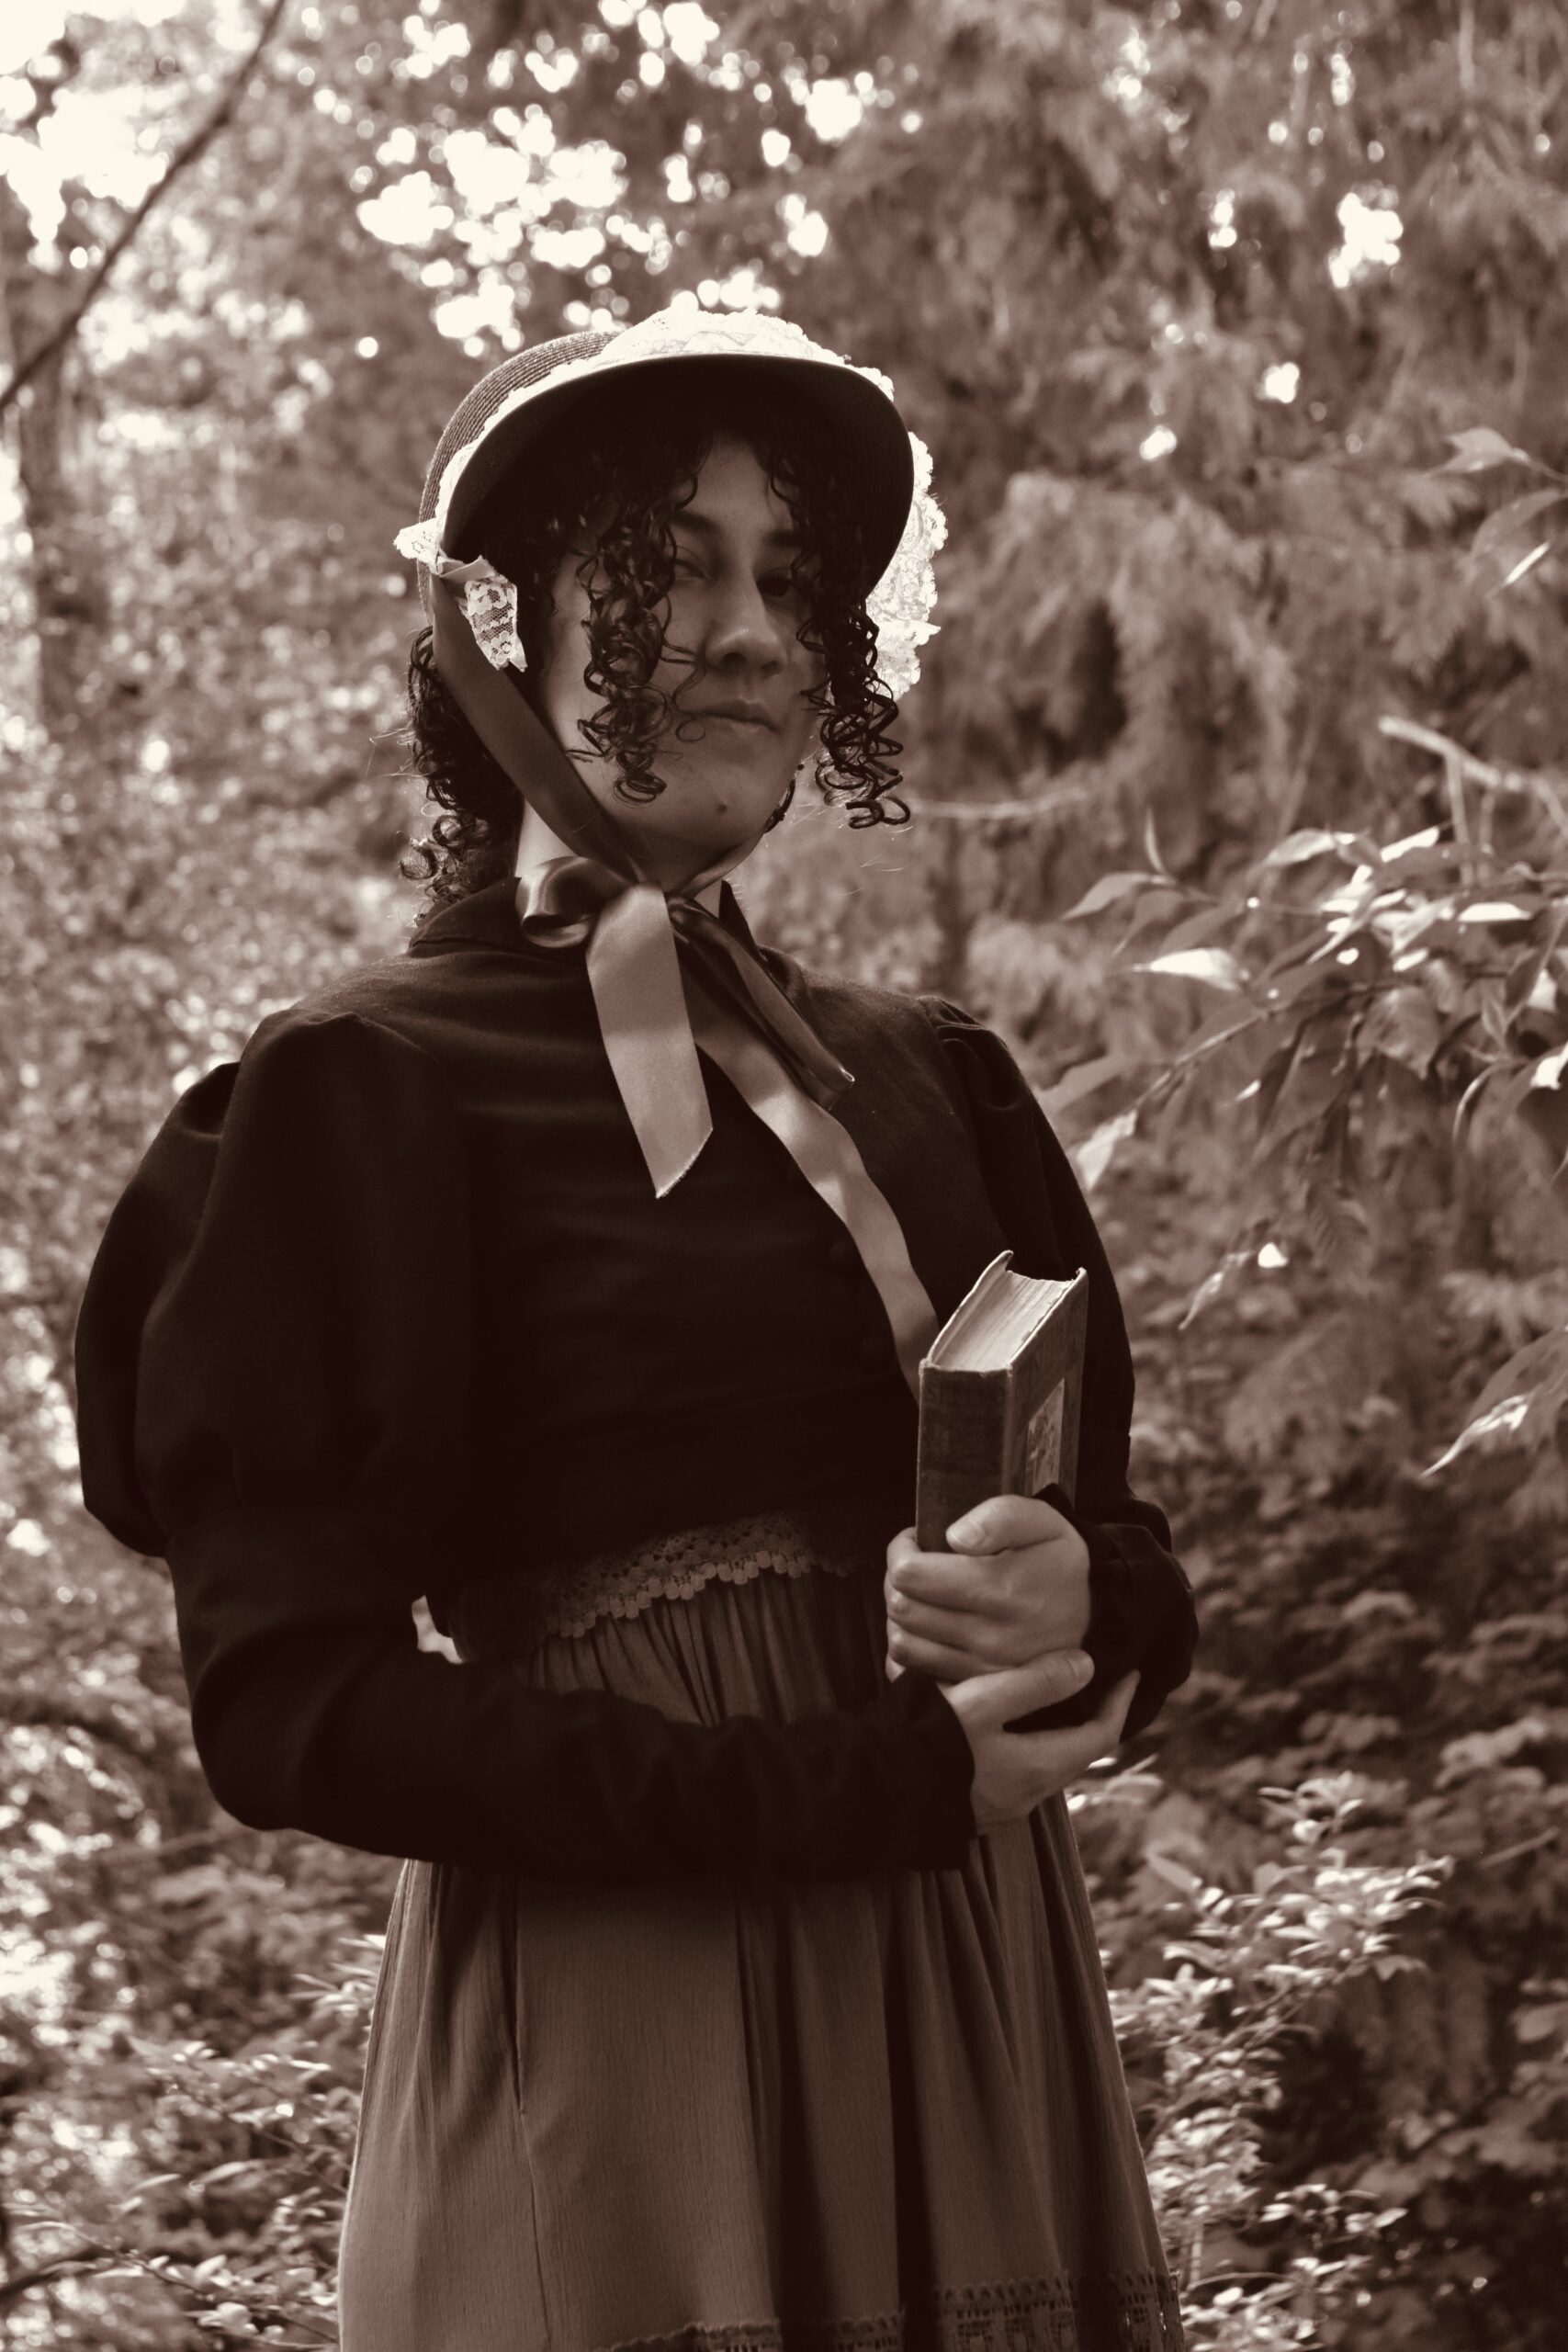
Usually, when I want to take photos of one of my outfits (like my steampunk outfit on the About page) I will use a tripod and a timer and try to position myself in front of the camera. It takes at least three shots to get the framing right, but even after the framing is good, there is still a possibility the photos won’t turn out because I am out of focus. All in all, it’s a time consuming hassle.
For this photoshoot though, my brother offered to take the pictures for me. I am so thankful he did, for we were able to catch golden hour and get some amazing shots.
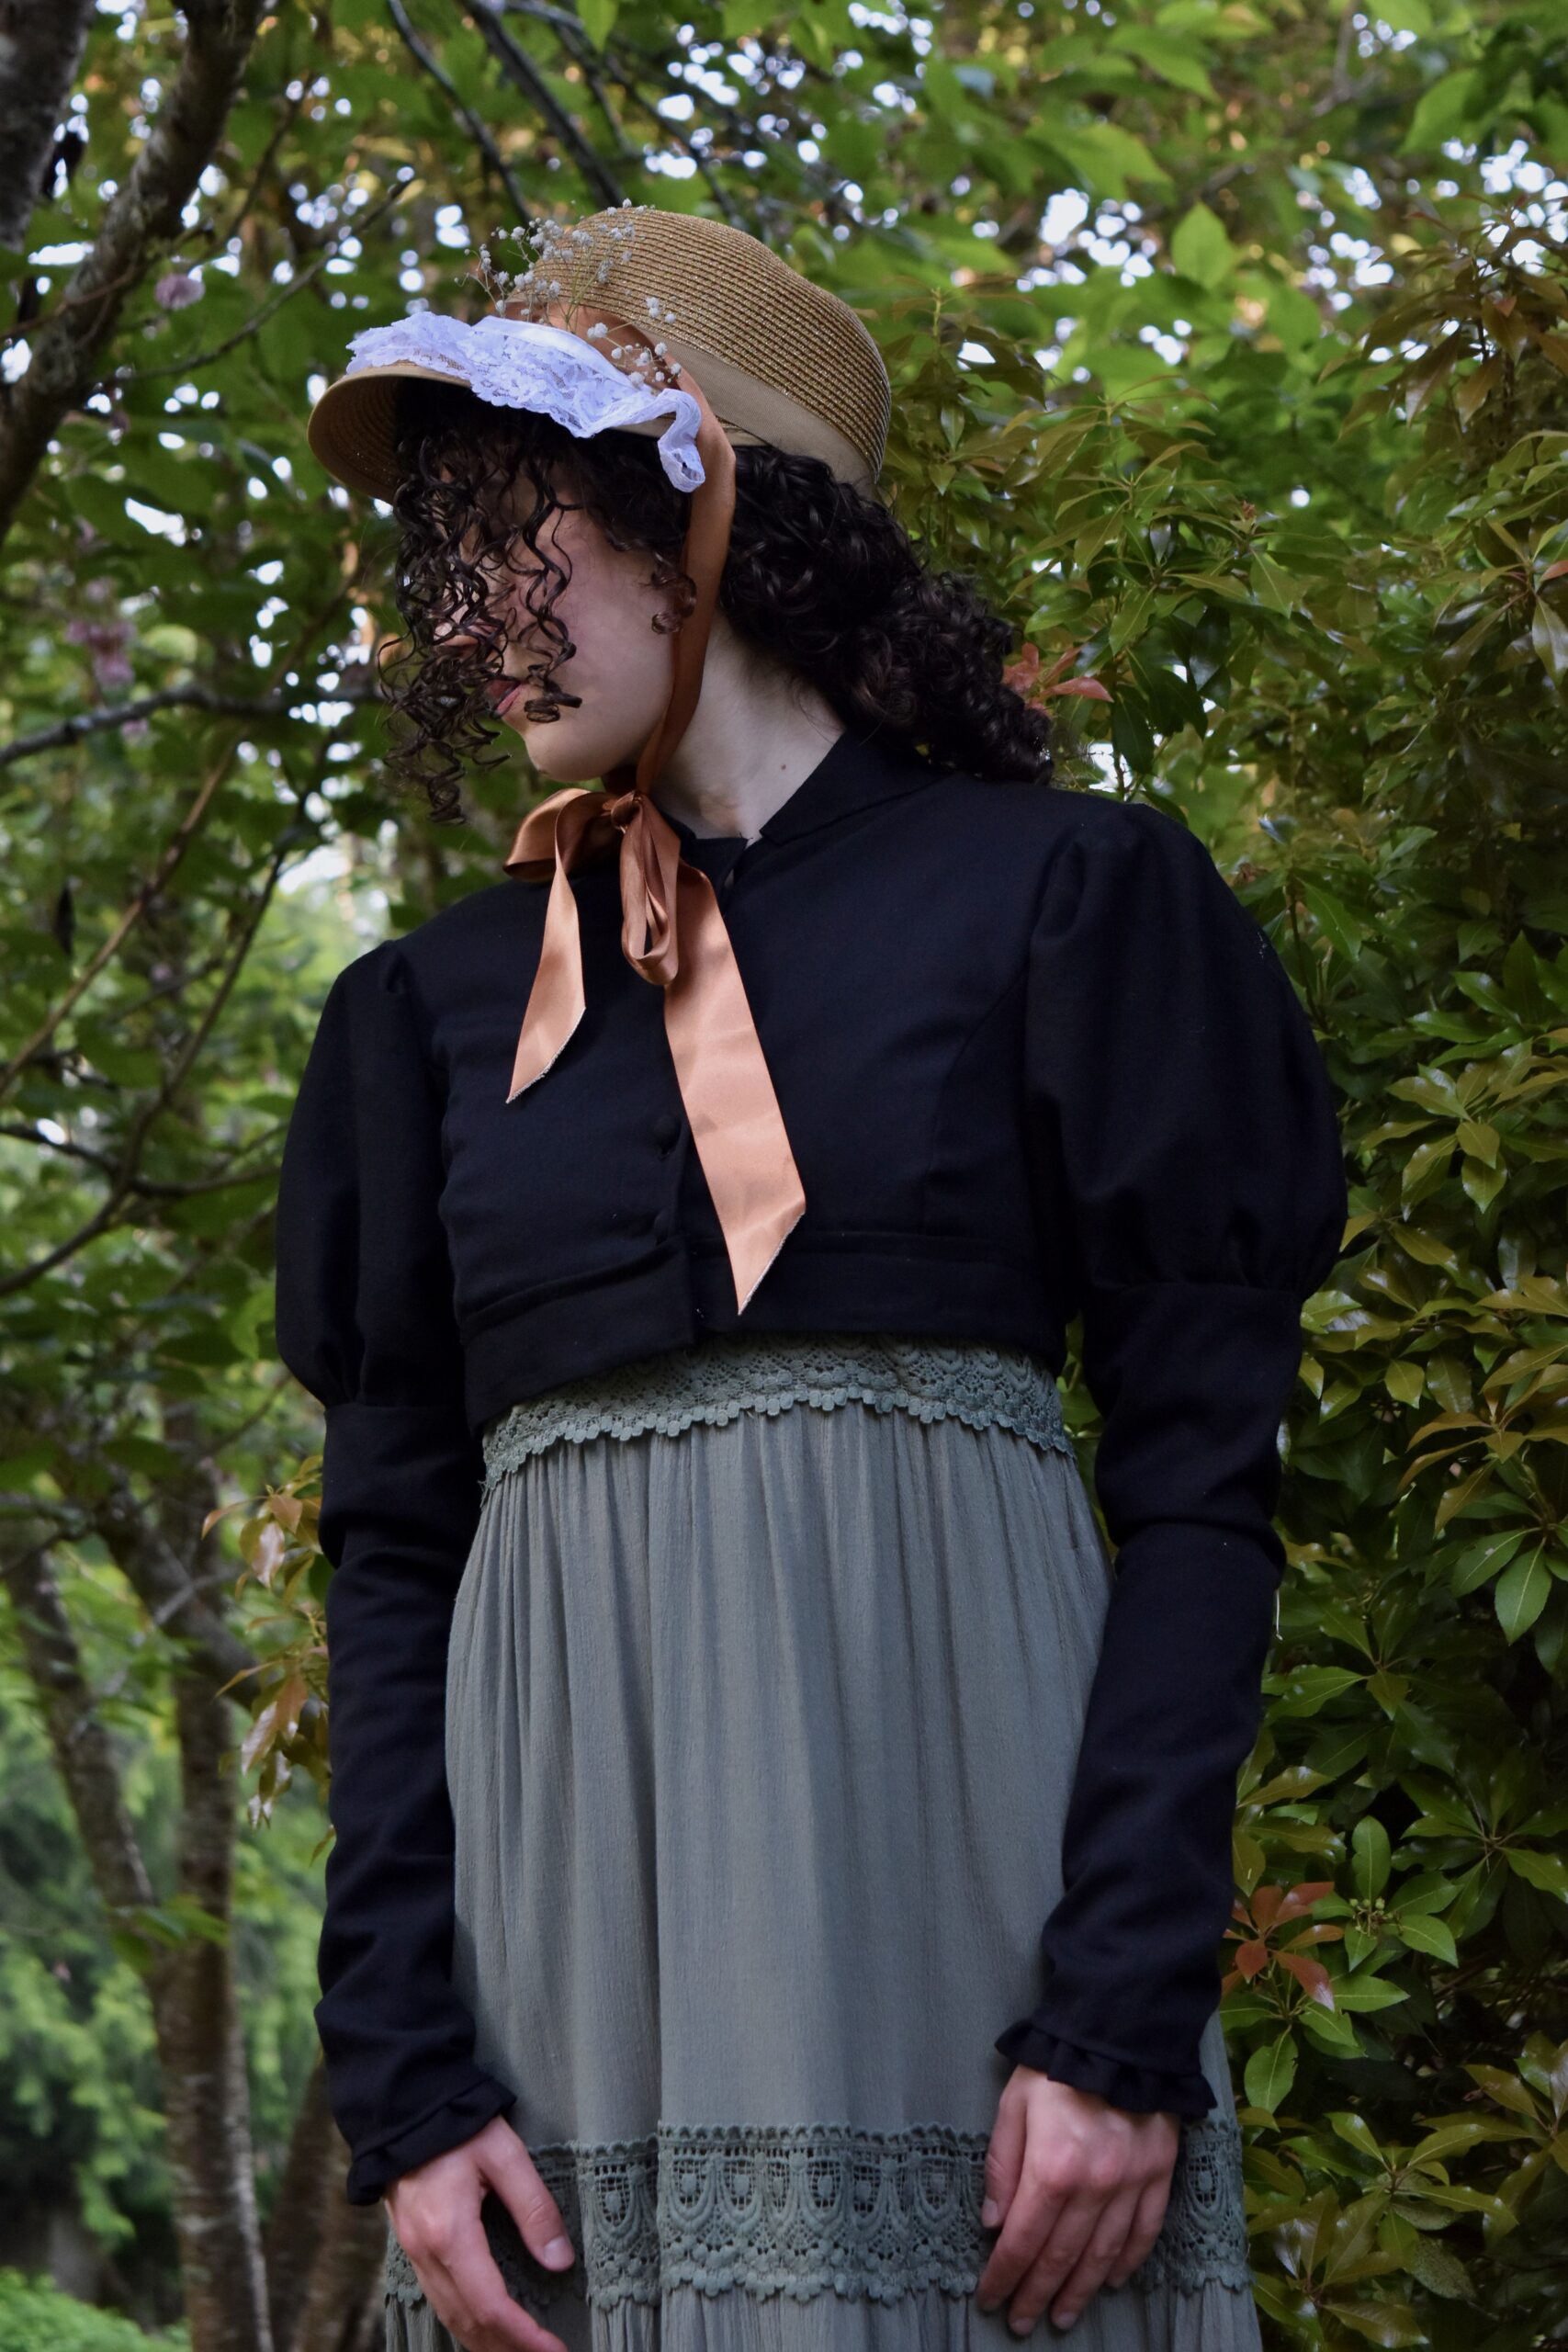
And that’s how I made a Regency Era spencer. All in all, it was a wonderful sewing project that taught me a lot of new techniques that I can (and have) implemented into current and future projects, (but more on that later 😉).
I hope you all enjoyed reading this! Have a wonderful day!
Hey Lilli, I had no idea